CentOS 5.1: Stripped Install

CentOS is the community based clone of Red Hat Enterprise Linux. Its stability and long release cycle make it perfect for building a home server or MythTV appliance. Let’s walk through the process of installing a stripped down but very functional version of CentOS 5.1 which can be the basis for your next Linux project.
History
History
Starting in March of 2000, Red Hat began rolling "enterprise" versions of their popular Linux distribution in an effort to increase income. The idea was that individual users would continue using their standard Red Hat Linux product, but those wanting increased stability and enterprise centric features should transition to their new premium offering for a price. Later in 2003, Red Hat stopped active support for their standard Red Hat Linux distro and instead turned it’s attention toward their enterprise market. Red Hat choose to give the project over to the community and the Fedora Project was born. Even though the project was to be a "community" based project, Red Hat was still actively involved in its development. They effectively used the Fedora Project as a breeding ground for their enterprise product. It was a good match as those that wanted the bleeding edge drivers and features could use Fedora, and those that favored stability and support could purchase Red Hat Enterprise Linux (RHEL).
Because RHEL is based on open-source software, it is mandated that the source code be made available for review / download. This is where the CentOS project comes in. CentOS takes these source files, and compiles them into RPM packages exactly like Red Hat does when it creates it’s package system. The end result is any given RHEL or CentOS package is binary compatible. The only things which are modified are Red Hat logos, and trademarks which are exchanged for CentOS logos. In fact, CentOS never mentions "Red Hat" by name on its website, but instead refers to them as "the upstream provider".
What does one get for all this trouble? A duplicate of RHEL without the costly support structure. The user also gets a perfect platform for creating a home NAS server, firewall, or MythTV appliance. Unlike the Fedora Project which releases a major version every 6 months, RHEL and CentOS are on a 2 year release cycle with several point releases in between. This makes it much easier for a system administrator to stay current on bug fixes without requiring frequent complete system rebuilds.
Beginning The Install
Beginning The Install
To begin, grab the latest copy of CentOS 5. As of the release of this guide, the latest version is 5.1, but this guide should be valid for subsequent point releases. There are a few choices to make up front. There are either 32-bit (i386) or 64-bit (x86_64) binary packages. For the most part, both are equivalent in terms of speed and compatibility, but I still tend to use the 32-bit flavor out of old habit. Visually, the install procedure is identical.
Next up is selecting the appropriate install media. Either 6 CDs or a single DVD are available to choose from. Again, I find the DVD to be simpler to keep track of, but if your hardware doesn’t have a DVD drive, then at least there is a backup plan offered. After selecting a reasonably close download mirror, there is yet another decision to be made: direct download or torrent. From past experience, torrent downloads move much quicker, but this will be dependent on your ISP and their P2P filtering strategy.
Once the ISO has been downloaded, burn it to disk, and boot the disk in your chosen hardware. Ensure that the hardware has at least 512 MB of RAM for a graphical based install (which we will be covering). It is possible to install with less RAM, but it is advised to do a text based install instead.
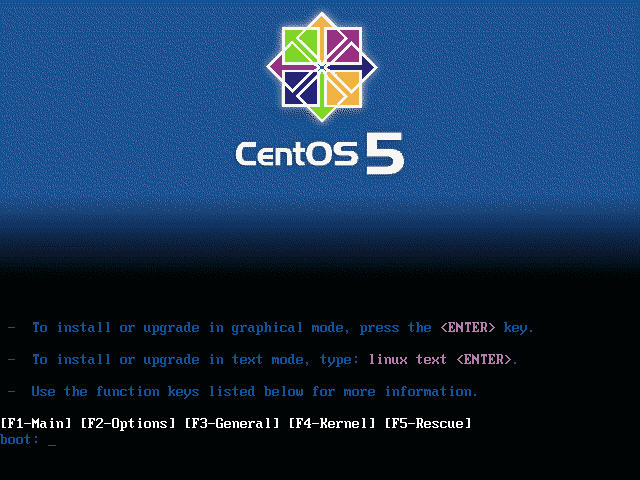 |
| Install Boot Option Screen |
Upon booting from the install media, the user will be presented with the text based prompt shown above. To continue with a graphical based install, either press <enter> or simply wait for the timeout. If the user wishes to use the text mode install, type "linux text" and press <enter>. This disk can also be used as a rescue disk buy typing "linux rescue" and <enter>.
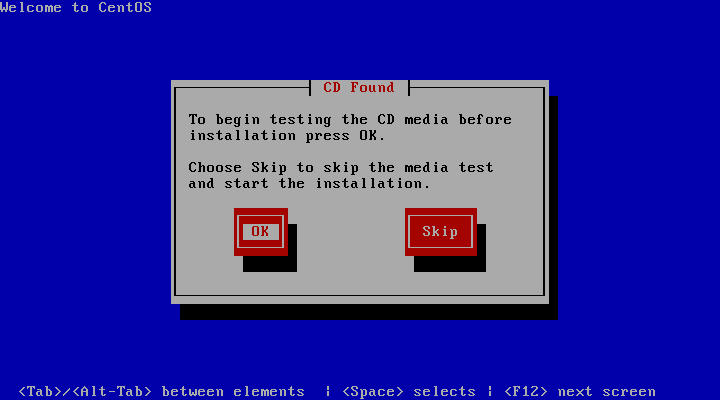 |
| Install Media Test |
As we all know, downloads can sometimes be corrupted or media scratched, so the install process offers a feature to test the media prior to the install. If it passes the test, the user can be sure that any install failure is probably not due to a corrupt media file.
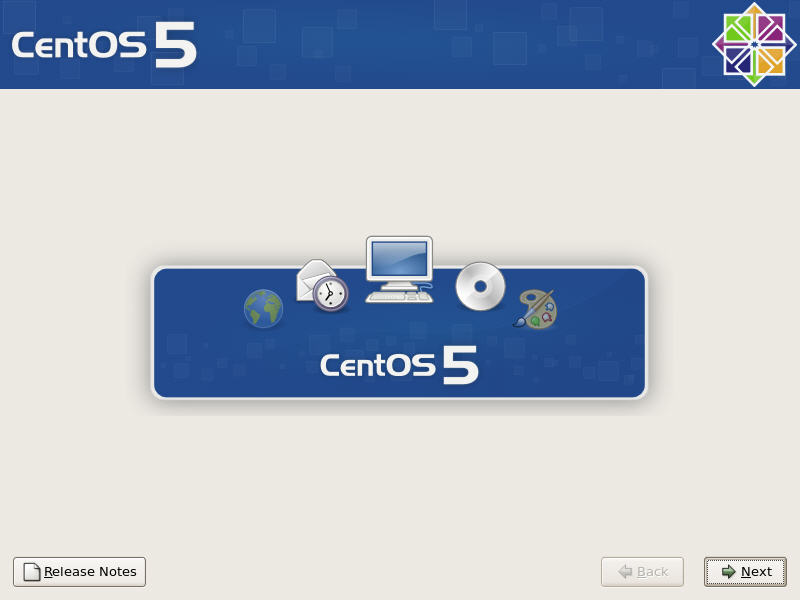 |
| GUI Install Splash Screen |
If all goes well and your hardware is supported, you will be executing the graphical installer and shown the CentOS 5 install splash screen above. If for some reason the graphical installer failed, all is not lost. Usually an error is shown which can be searched on via Google. If that fails then there is always the text mode install to fall back on.
Locale And Drive Partitioning
Locale And Drive Partitioning
 |
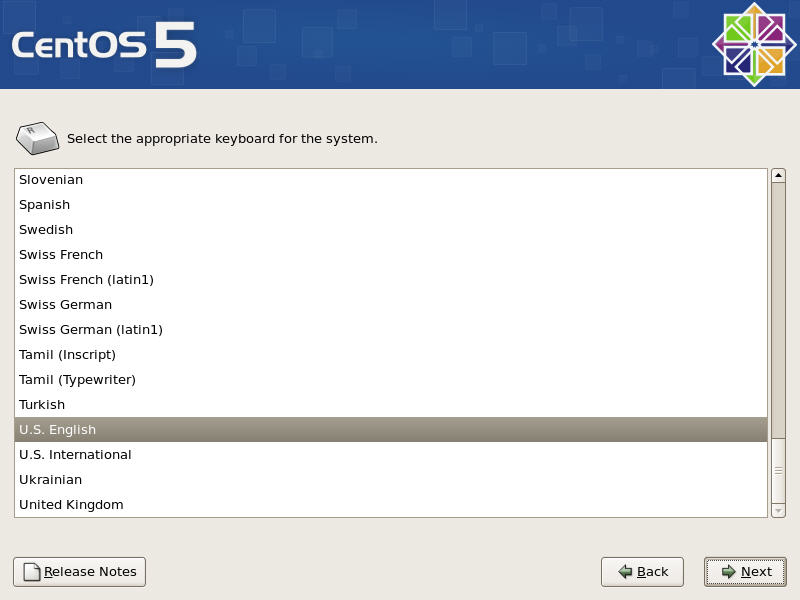 |
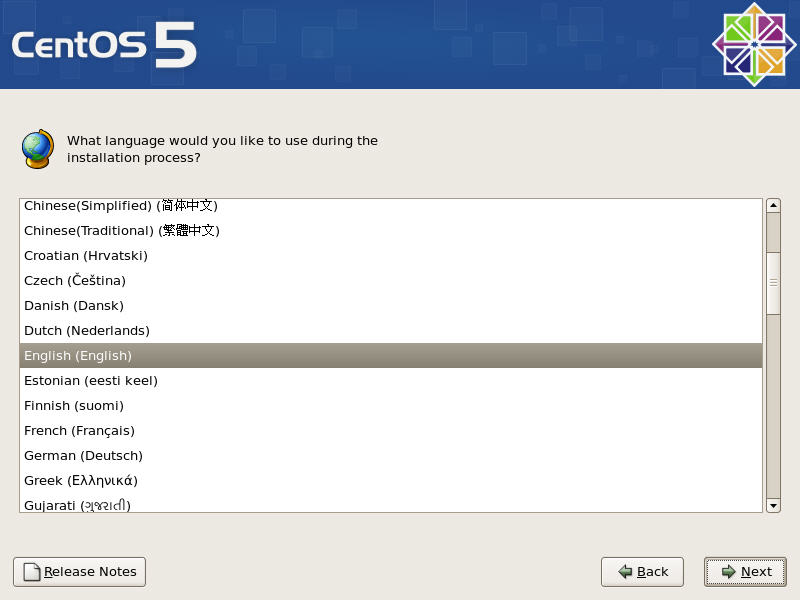
| Install Language Selection | Keyboard Selection |
The first part of the install defines your language and keyboard configuration as shown above.
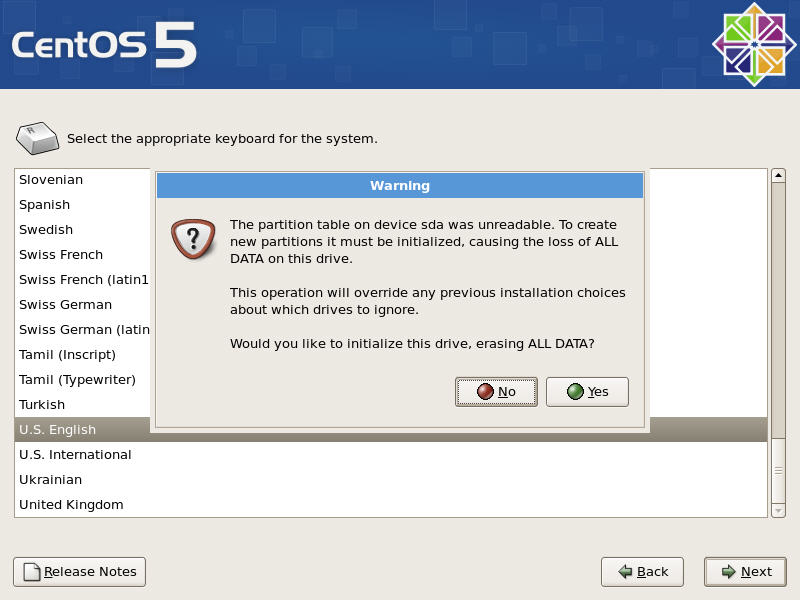 |
| New Hard Drive Warning |
If the hard drive is completely void of partition table information, the user will be prompted to verify that it is OK to initialize the drive. The install writers tend to lean on the side of caution whenever there may be doubt as to the next step. Click "Yes" to continue.
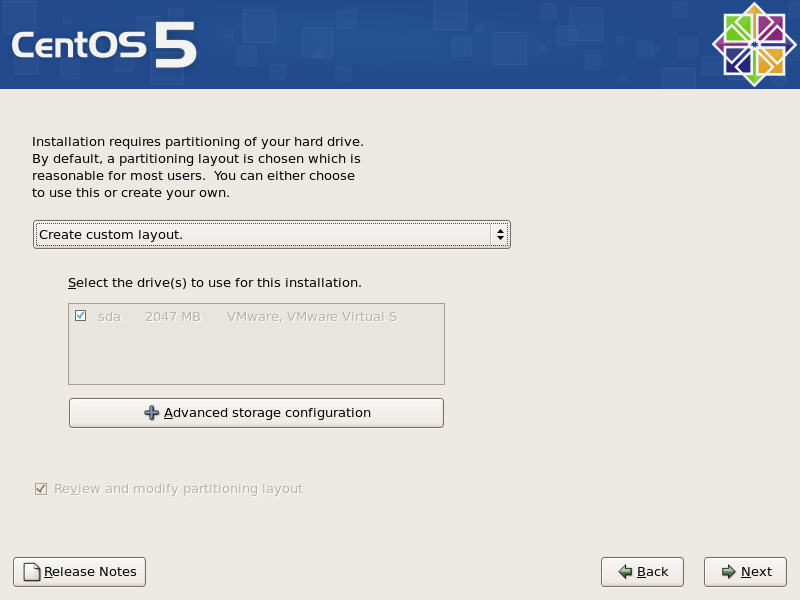 |
| Drive Partition Layout |
I don’t know about you, but I don’t like things happening without my knowledge, so I always select "Create custom layout" from the drop down list. This gives the user complete control over how the disk will be partitioned.
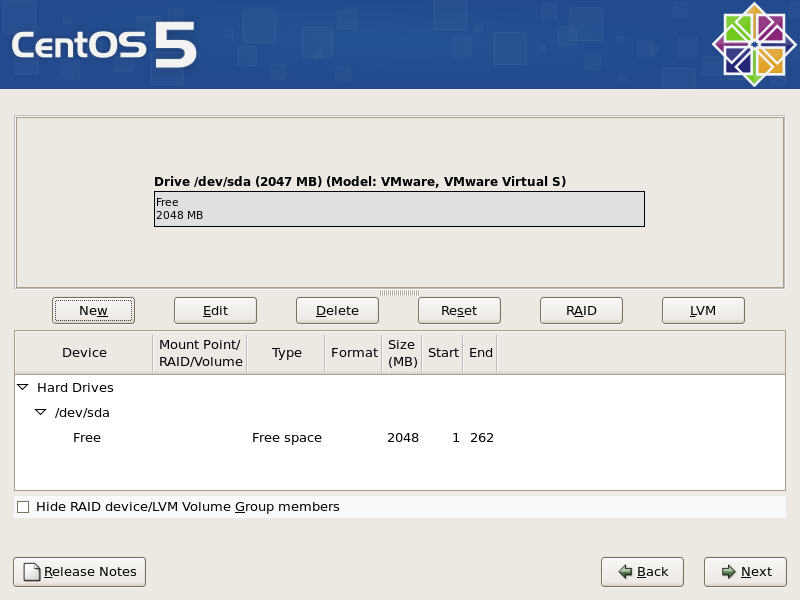 |
| Partition Editor |
Partitioning schemes for Linux are as varied as the users themselves. Dual-booting, RAID, or LVM present their own challenges. For the sake of simplicity, we will assume a clean single drive system. As can be seen above, this install was done within VMware where 2 GB of drive space was provided. Obviously, this is quite small by today’s standards, but it will serve the purpose of this guide.
 |
| Add New Partition |
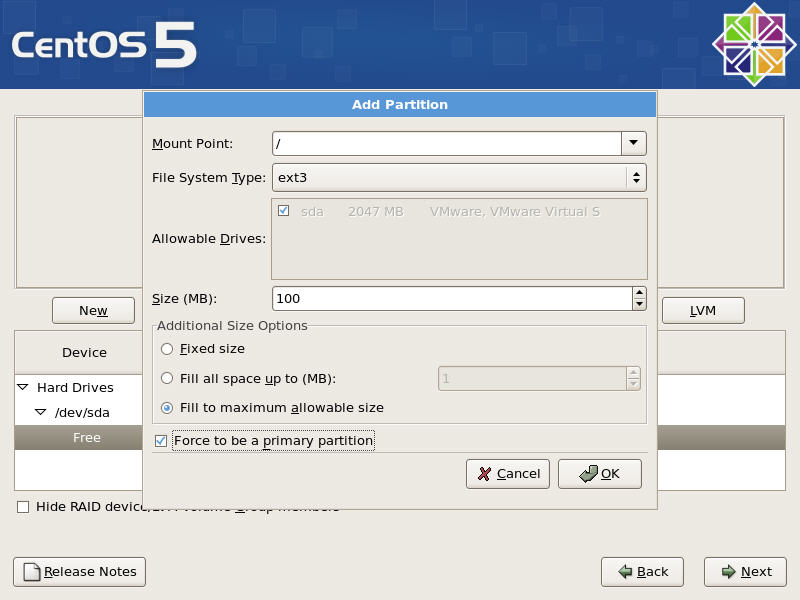
Adding a partition is as simple as highlighting the free space on the drive and clicking the "New" button. The install routine will prompt for the mount point, file system type, and size among other things. In this case, we want to define a single root partition, so we configure the dialog as shown. Note that although the size has "100" MB in the field, enabling "Fill to maximum allowable size" will tell it to fill the whole drive.
 |
| Partition Added |
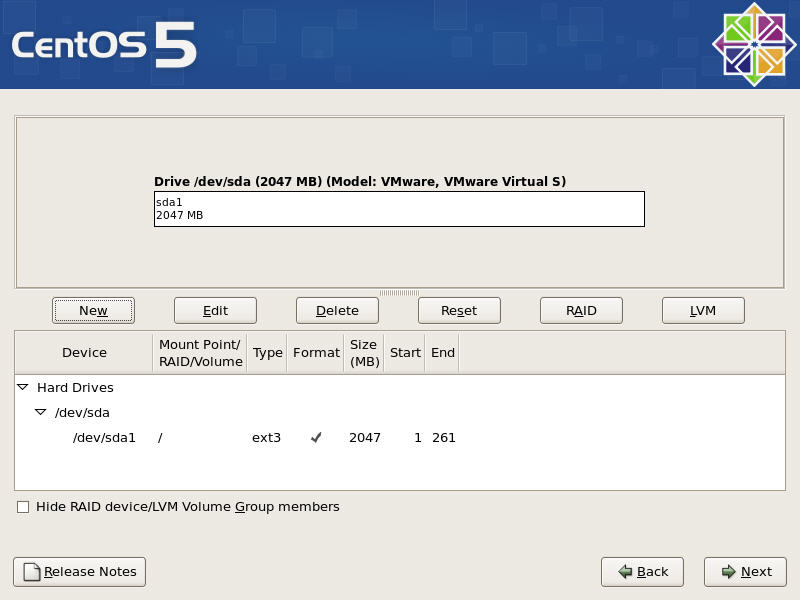
Clicking "OK" will show the above screen with "/" or root partition consuming the entire drive. Also, note how drives are denoted in Linux. If you are familiar with Windows, then you are probably used to thinking in terms of drive C or drive D. As with other things in Linux, it gives the user a bit more info regarding what is happening behind the scenes. In our case, "/dev/sda" is our first SATA or SCSI hard drive. If we had a "/dev/sdb" in the list then that would be the second SATA or SCSI hard drive. Partitions are simply an extension of this nomenclature. For instance, the first primary partition on the first drive is labeled "/dev/sda1". Due to historical reasons, IDE drives are denoted as "/dev/hda" or "/dev/hdb" along with their partitions such as "/dev/hdb2".
Most Linux users will want to add a swap partition to this configuration. Just like Windows, Linux can make use of a swap partition to hold data which has been swapped out of RAM. It is possible to make Linux use a file based swap like Windows. However, Linux prefers to have the swap occupy its own partition as it can be better optimized. Choosing the size of the swap space is also a bit of an art form, where there are many opinions. If you plan to perform a suspend to disk on this PC, then you will need to ensure the swap is at least as big as the system RAM.
 |
| Swap Partition Warning |
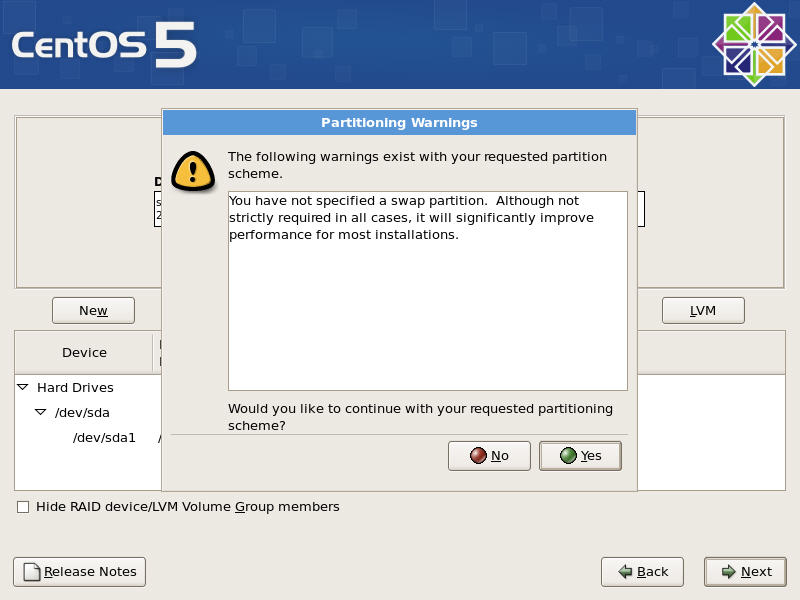
I have specifically decided not to create a swap partition (more on this in the CentOS 5.1: Flashed Guide ), so the installer is again warning me of my impending doom. This is handy for the novice user, but I choose to ignore it.
Boot Loader, Network, Time Zone, And Root Password
Boot Loader, Network, Time Zone, And Root Password
 |
| Boot Loader Configuration |
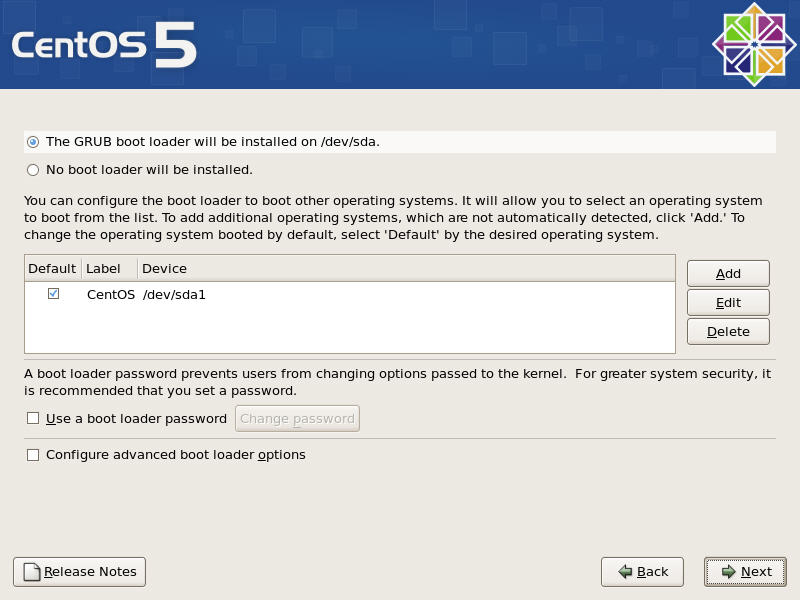
Because we are using a single drive system which will only be running CentOS, the boot loader configuration is relatively simple. The boot loader will be installed in the Master Boot Record on the first drive and the CentOS install found on /dev/sda1 will be the default OS to boot.
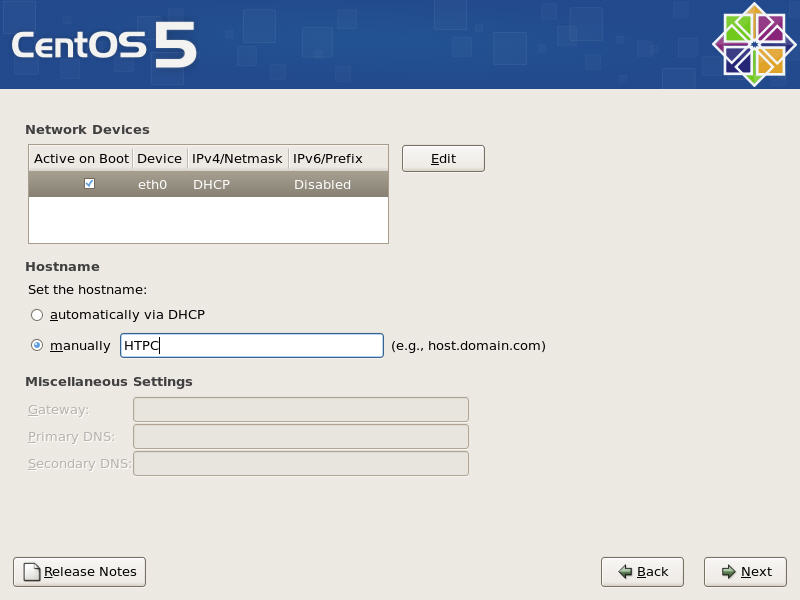 |
| Network Configuration |
With this hardware, there is only a single network card which will be configured automatically via a DHCP server on the network, so the network setup is fairly simple as well. Because I haven’t switched over to IPv6, I have disabled IPv6 under the "Edit" button. This isn’t necessary, but it does release some resources. Because we build HTPCs around here, we are going to give this a hostname of "HTPC".
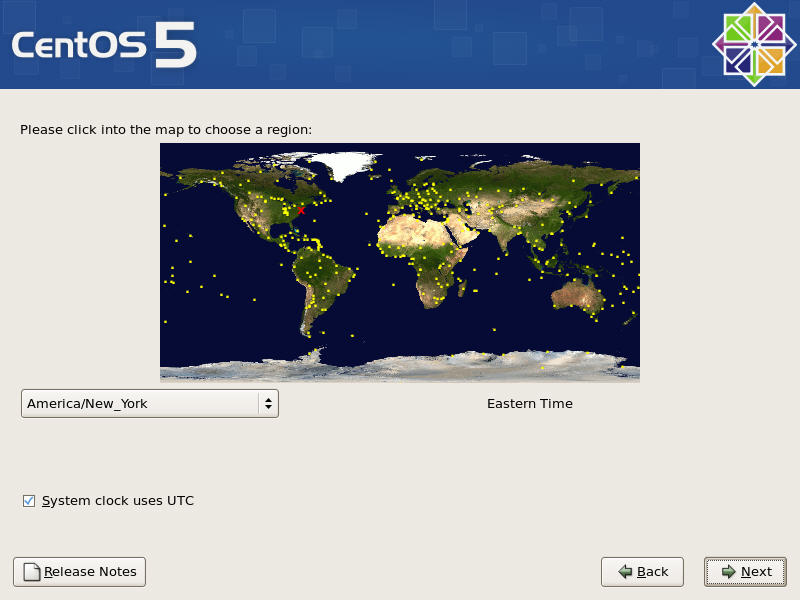 |
| Timezone Selection |
Next up is the timezone selection. Simply pick a city in your timezone which is closest to you. Selecting "System clock uses UTC" will enable your PC to seamlessly deal with daylight savings time. Enabling this feature on a dual-boot PC with Windows will cause the clock to display the wrong time.
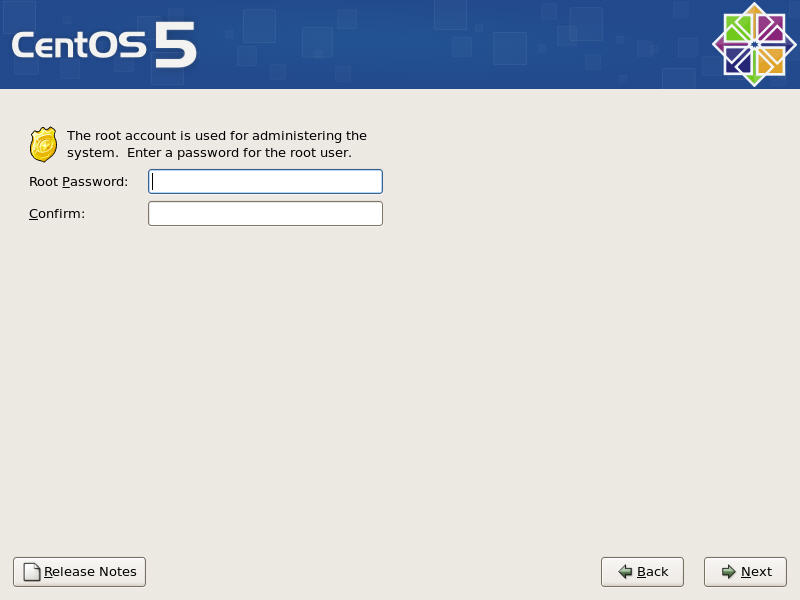 |
| Root Password |
Here is the most important password you will create. It is the root or administrative password for the system. Whoever can provide this password will have complete access to the system. Because of this, it is wise to not only pick a strong password, but one which is easily remembered without requiring sticky notes.
Package Selection
Package Selection And Install
Here we will see how flexible the CentOS install routine can be in regards to package selection. For our project, we are going for a slim, fast, and functional install, so we will be disabling several packages which are installed by default. I have found that after an install is completed, it is much easier to add packages to a minimalist setup than it is to rip packages out of a bloated setup.
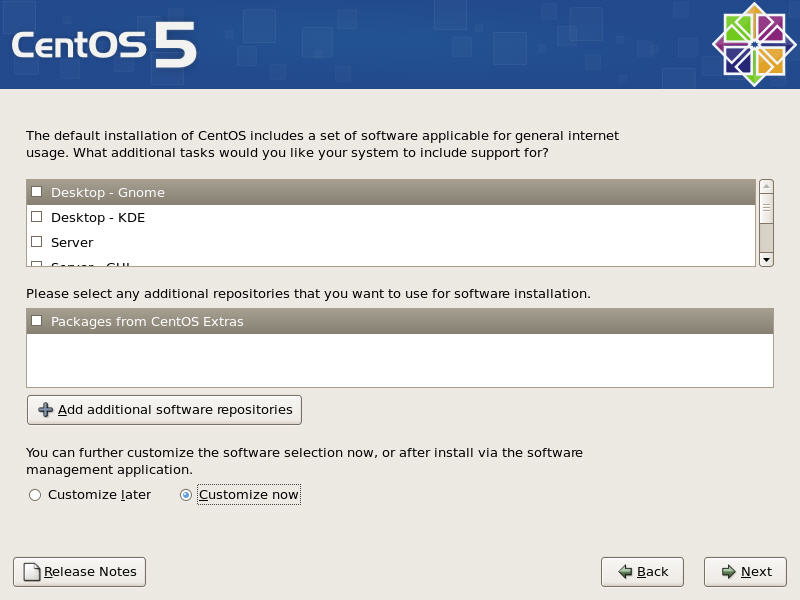 |
| General Task Selection |
This screen allows the user to choose what general categories to install. In our case, disable everything in the upper list. CentOS comes with a standard set of software by default and we want to hand customize this in the following screen, so select the "Customize now" option at the bottom. Ensure that the PC has an Internet connection and check the "Packages from CentOS Extras" option.
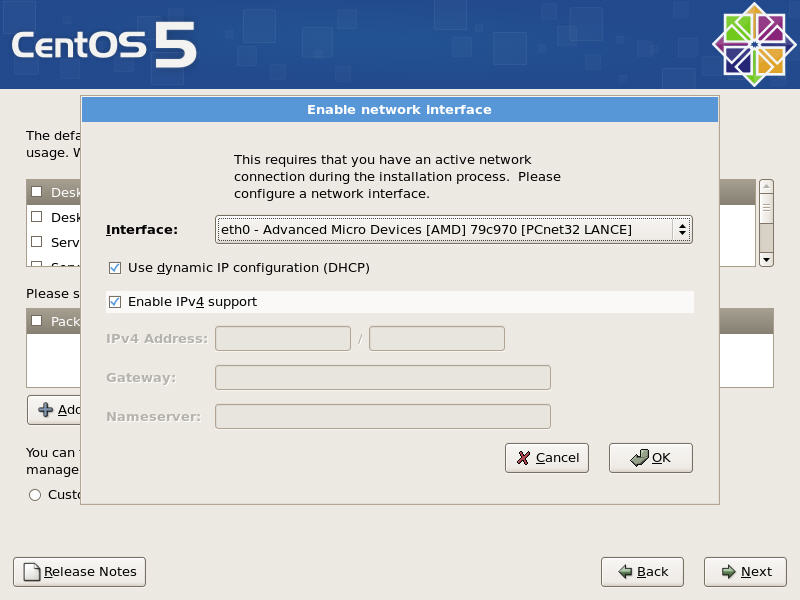 |
| Extras Network Configuration |
The install routine will now probe for the network card to determine the required driver. It needs a network connection as it will pull the CentOS Extras packages over the Internet.
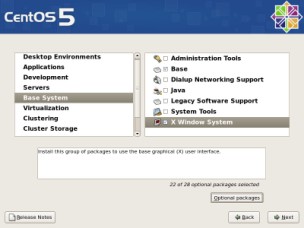 |
| Base Package Selection |
There are several packages which are enabled by default. For our purposes, only enable "Base" and "X Window System" under "Base System". Make sure to select each category on the left and disable any other package groups on the right.
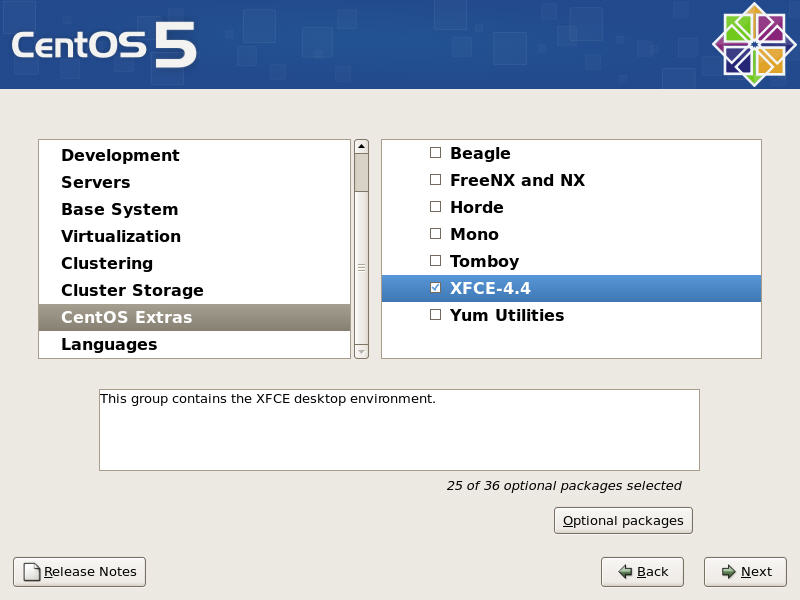 |
| Xfce Package Selection |
Because using a GUI is a little more handy than fiddling with the console, enable "XFCE-4.4" under the "CentOS Extras" category. Gnome and KDE are the GUI managers that most users typically associate with Linux. As of late, I have found that they both have increasingly traded speed and a small footprint for candy graphics and dancing icons. Xfce aims to keep the functionality bar high while not requiring a Cray Supercomputer to keep things moving.
To slim this package down a bit, ensure that "XFCE-4.4" is highlighted and click "Optional Packages".
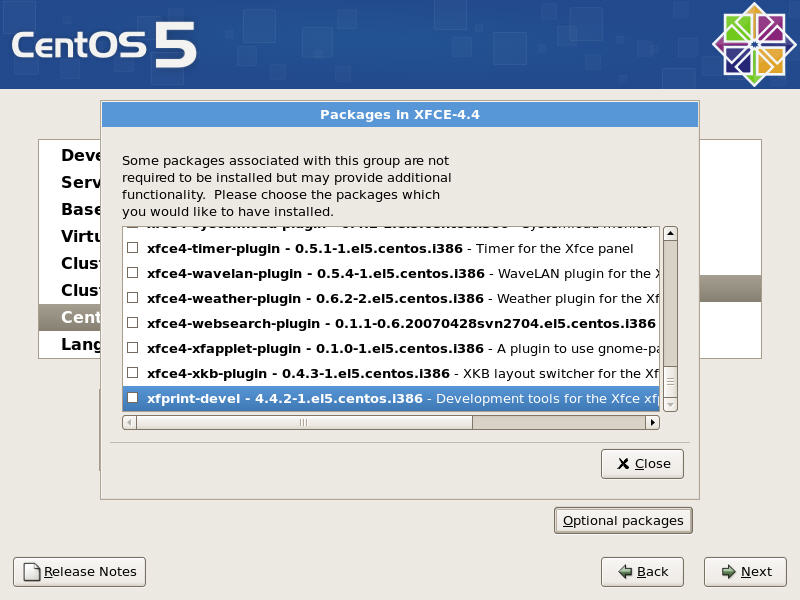 |
| Xfce Specific Package Selection |
Scroll through the list and disable everything. Upon closing the package list, ensure the installer says "0 of 36 optional packages selected" for "XFCE-4.4".
 |
|
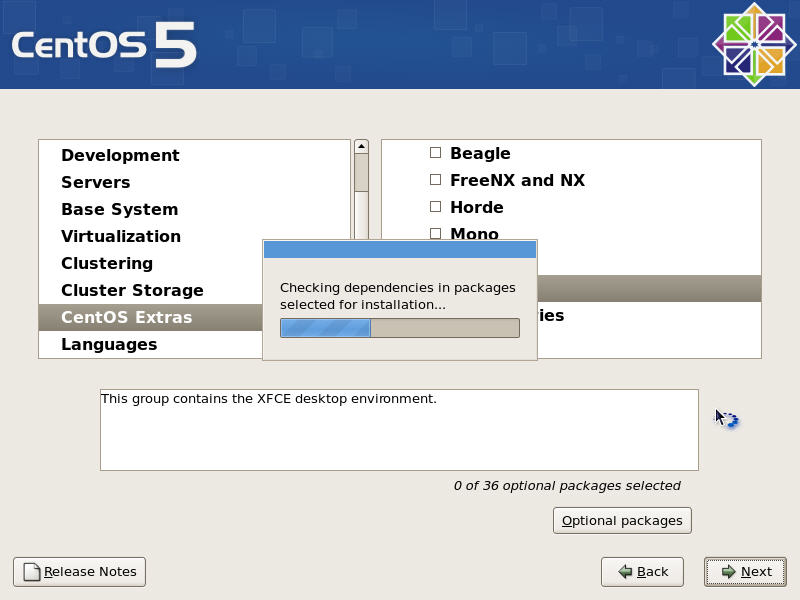
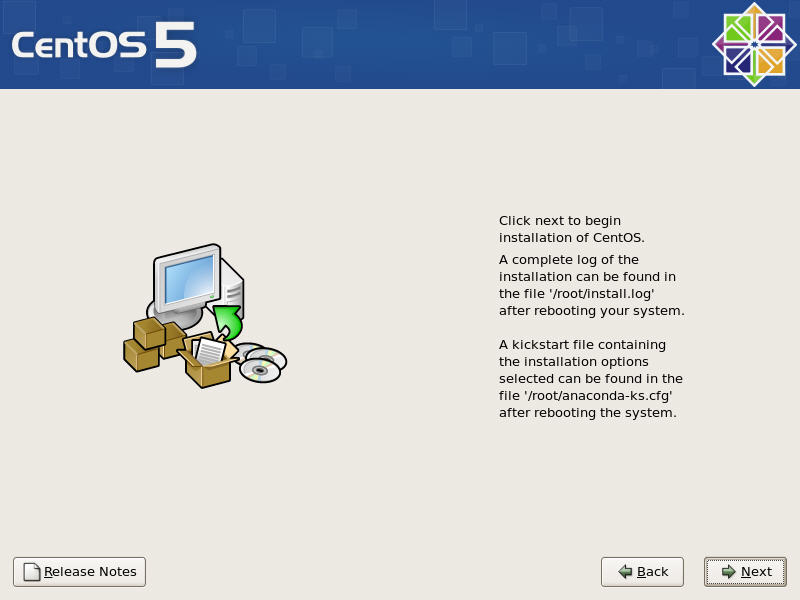
| Checking Package Dependencies | Ready To Install |
CentOS is now analyzing the selected package choices and determining if additional packages need to be added to satisfy any dependency issues. Once that is complete, CentOS will announce that it is in fact ready to go ahead with the install. From this point on, the hard drive will be modified.
 |
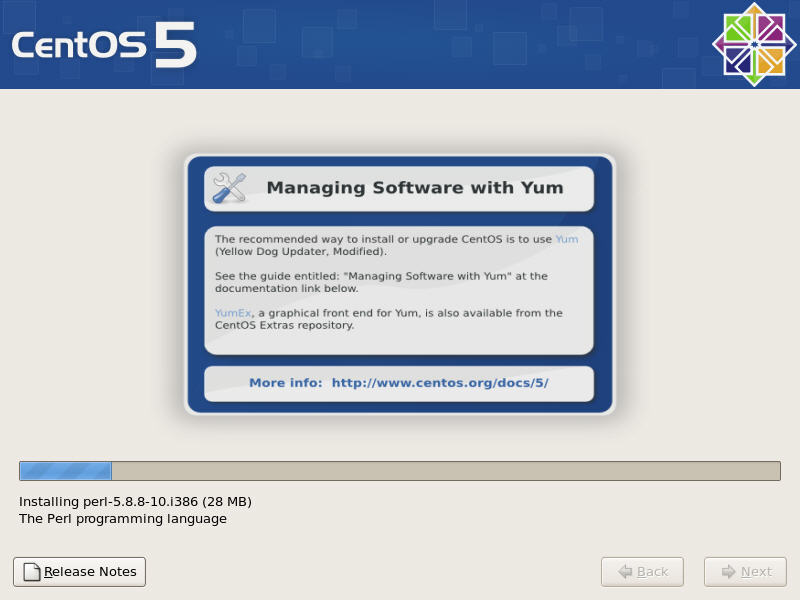 |
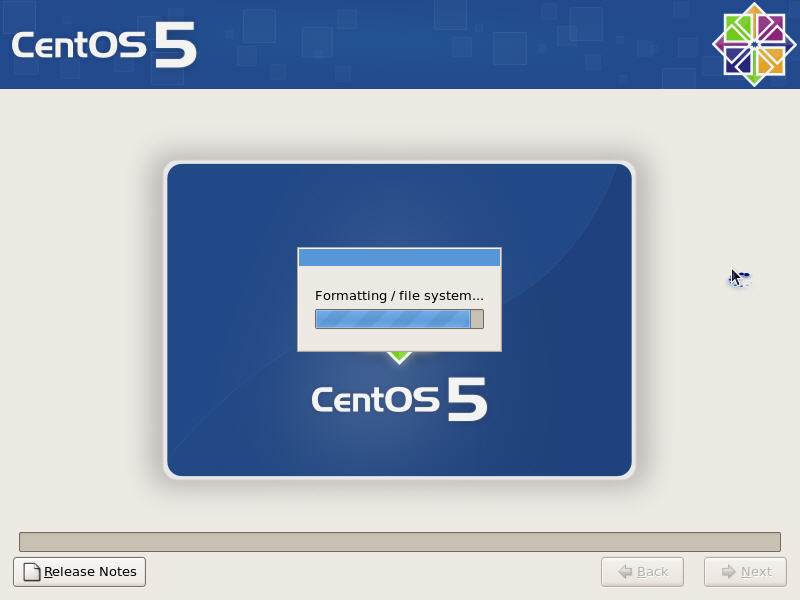
| Formatting Root Partition | Package Installation |
First, the hard drive will be partitioned and formatted to match the user’s requests. Next, all the selected packages and their dependencies will be installed onto the hard drive.
 |
 |
| Post Install Config | Install Complete |
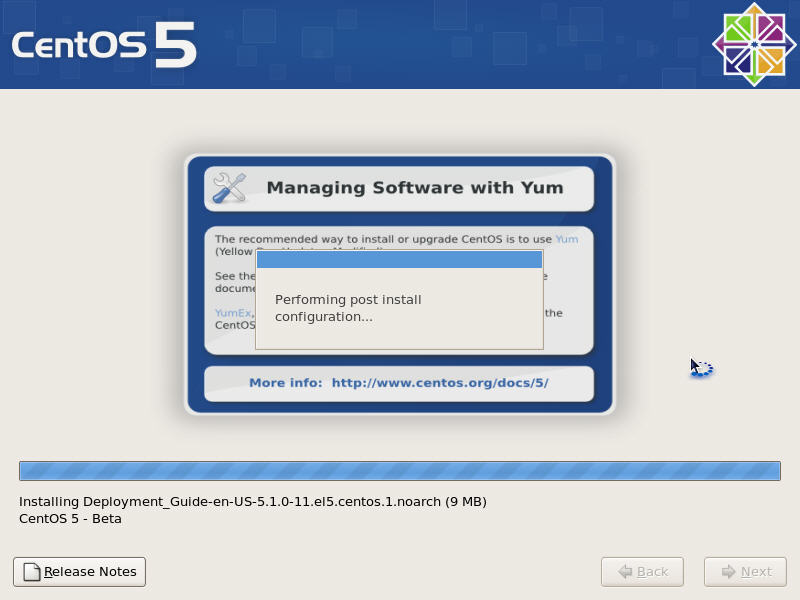
Lastly, it will write several configuration files to the hard drive and prompt the user to reboot. Next up, CentOS nirvana.
Initial Boot
Initial Boot
 |
 |
| Boot Manager | GUI Boot Progress |
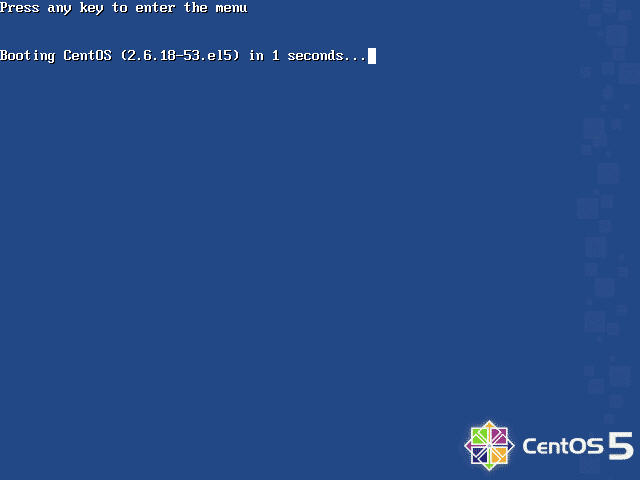
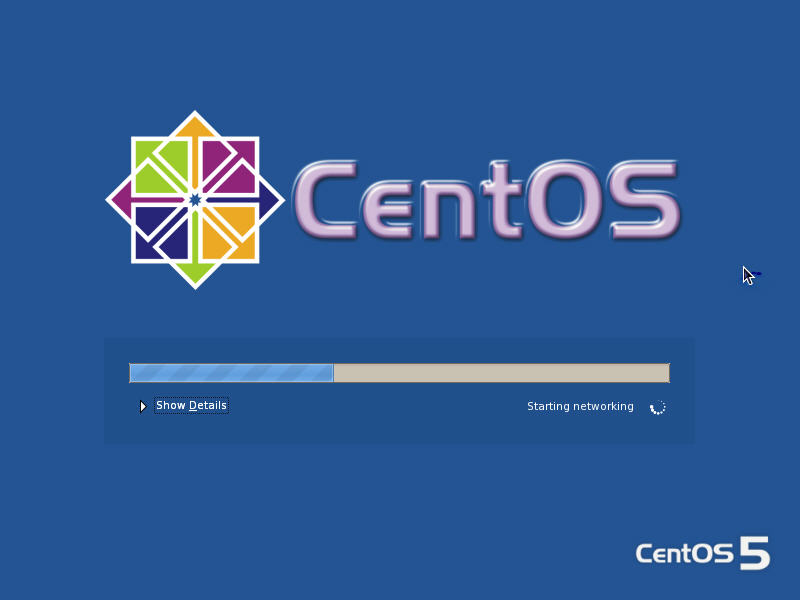
Upon reboot, the boot manager, GRUB, will briefly display the installed CentOS kernel version. After a few items scroll by in text mode, the boot sequence will switch to a GUI where it will outline the remainder of the start up sequence.
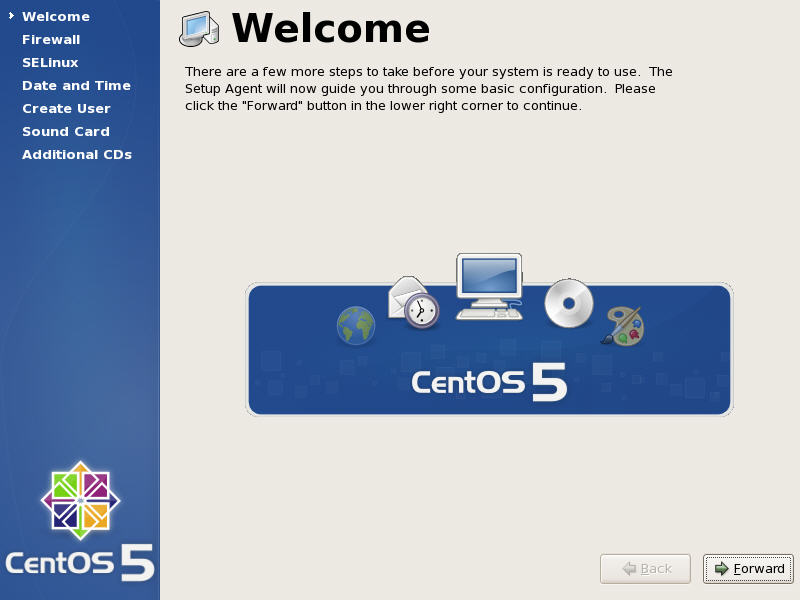 |
| First Boot Welcome Screen |
Now the user is presented with the first boot welcome screen. This is a short setup wizard which is run to customize the CentOS install further.
 |
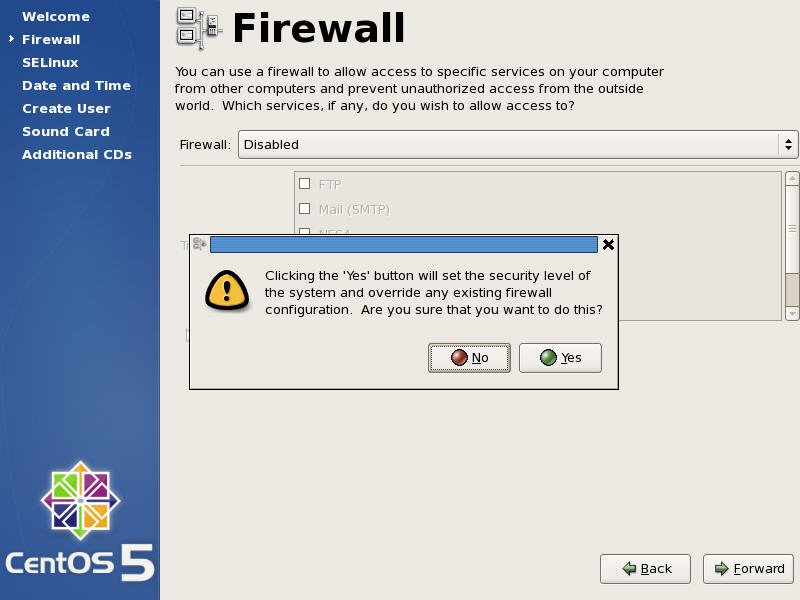 |
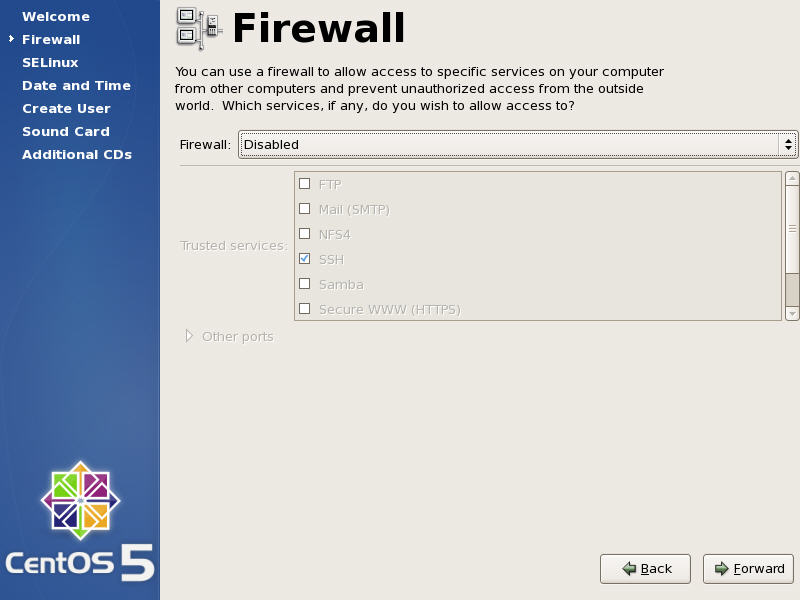
| Firewall Config | Firewall Warning |
Because this PC will be sitting behind a router/firewall and will not be receiving any direct Internet traffic it is safe to disable the firewall. Of course, the CentOS install gurus will question your sanity and give you an option to change your mind.
 |
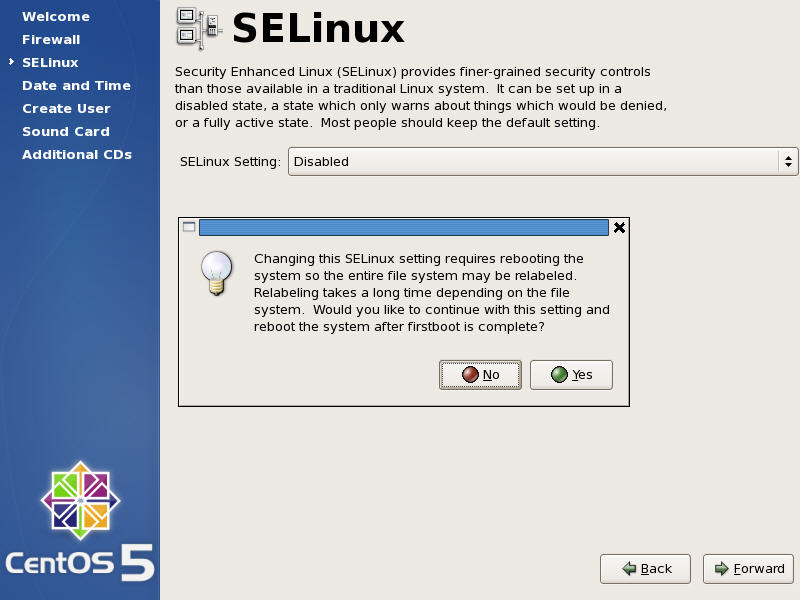 |
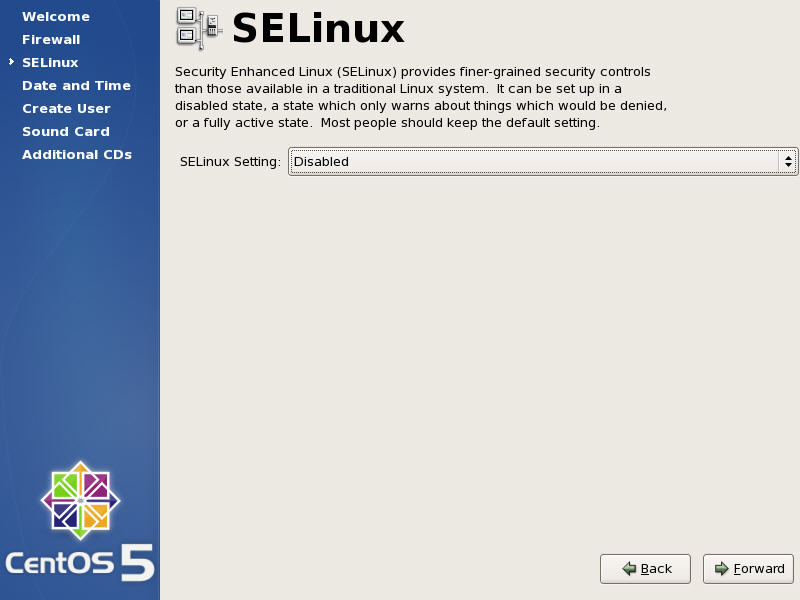
| SELinux Config | SELinux Warning |
SELinux is a great application which gives the administrator exceptional control over what users and programs are allowed to do. In this case, it is a nuisance, so it has been disabled.
 |
| Date And Time Config |
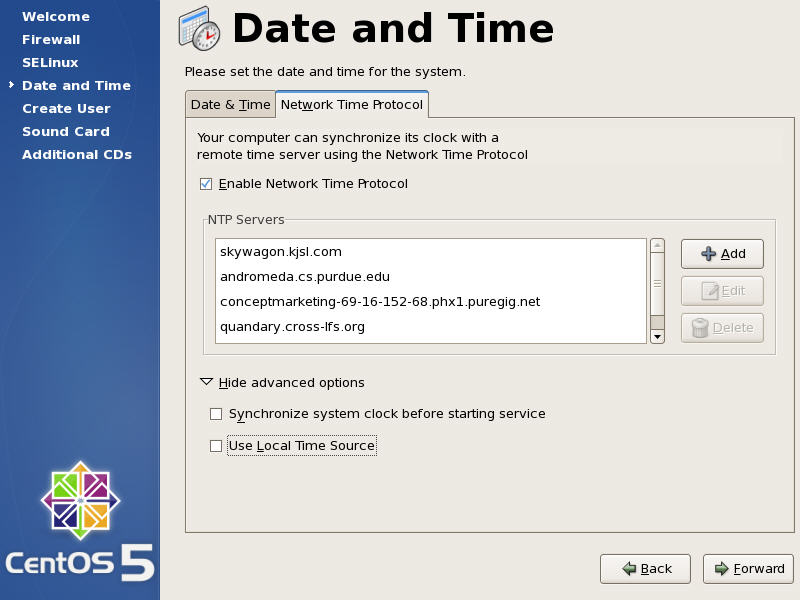
Here, the user can indicate the local time and date. There is also the option to use the network time protocol to keep the PC in sync. Be sure to drop down the advanced options and disable "Use Local Time Source" as most people don’t have an atomic clock attached to their PC.
 |
| Create Non-Root User |
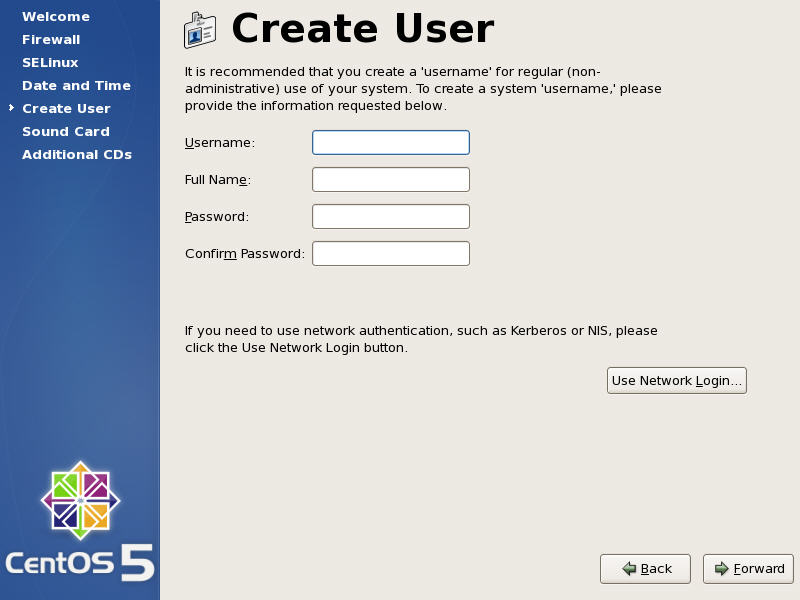
Because it is not a good habit to directly log in with your root account, CentOS prompts the user to create a standard user account. Again, ensure to use a reasonably secure password.
 |
 |
| Sound Card Config | Sound Card Test |
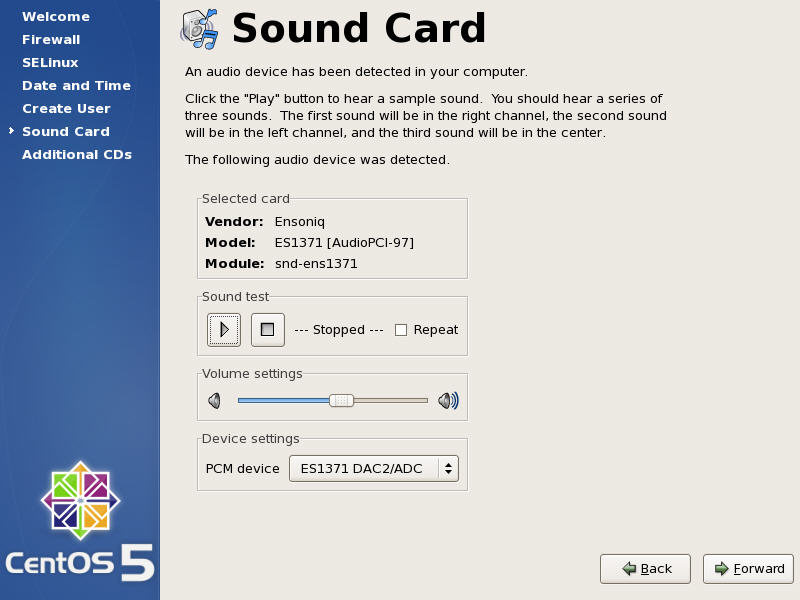
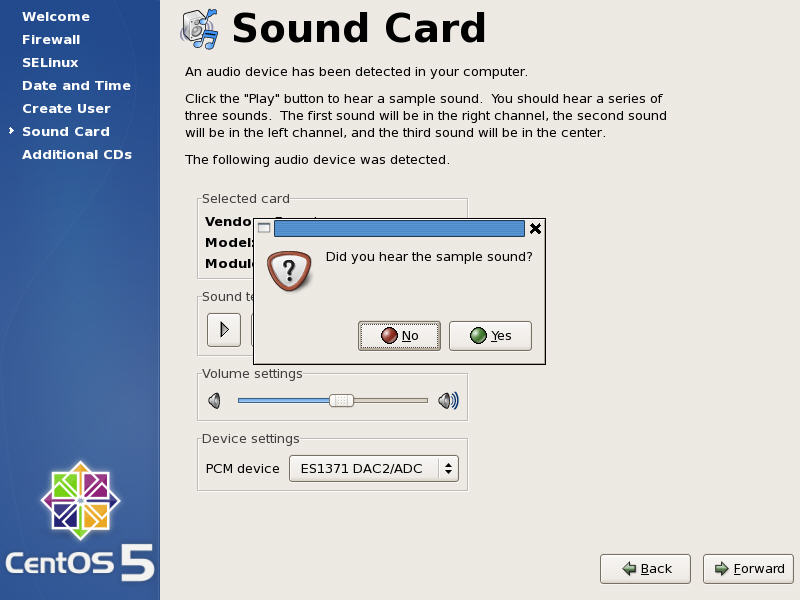
CentOS will now attempt to detect the sound card. If it finds one, play the sample sound to verify its selection.
 |
 |
| Additional CDs | Reboot Warning |
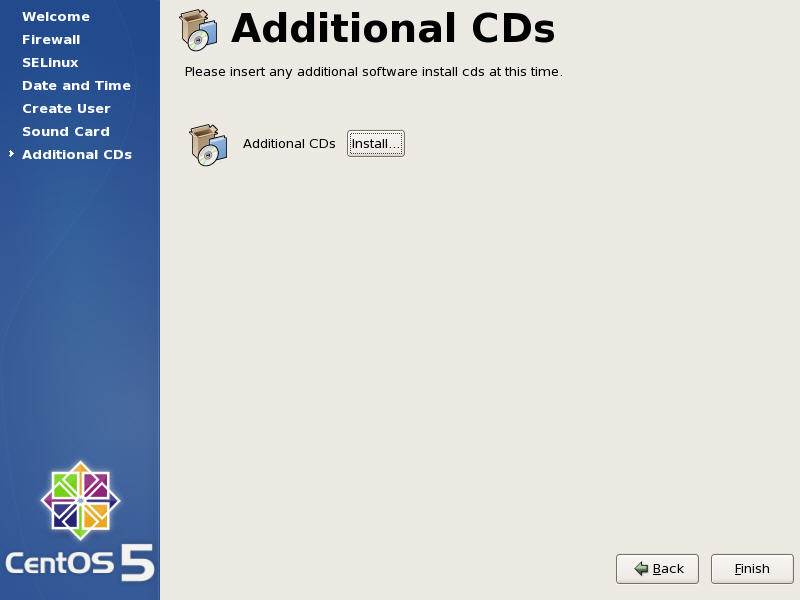
The installer now allows the user to install additional software. In this case, it is not required. Because of our changes to the SELinux sub-system, the PC must now be rebooted.
Xfce And Updates
Xfce And Updates
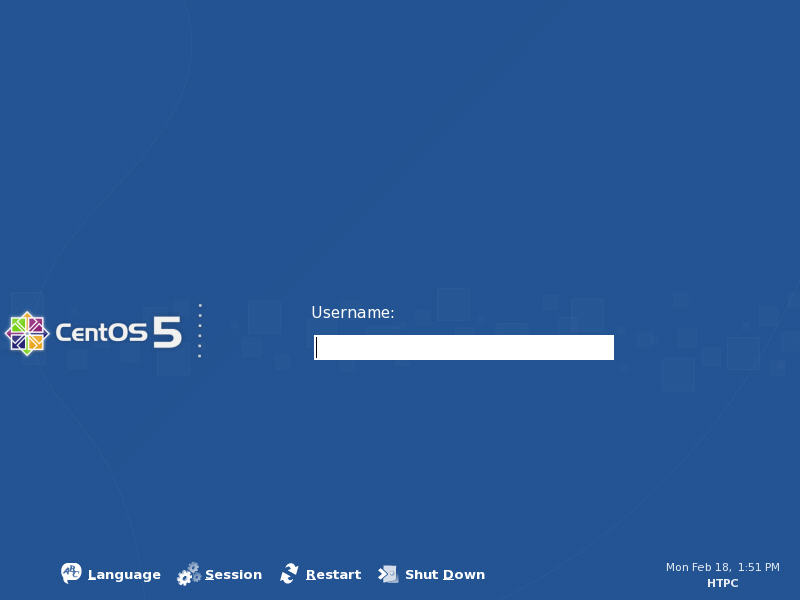 |
| Initial Login |
After the system restarts, CentOS will now show its login screen.
 |
 |
| Session Selection | Default Session Verification |
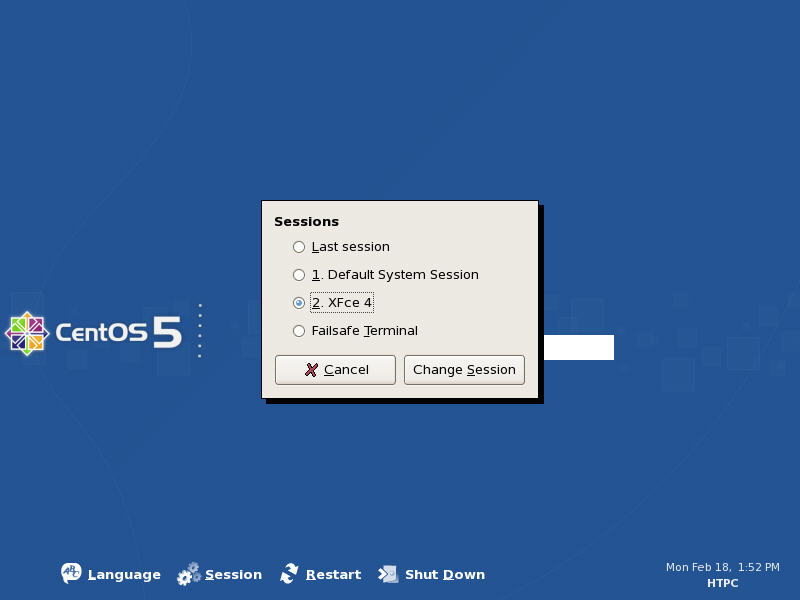
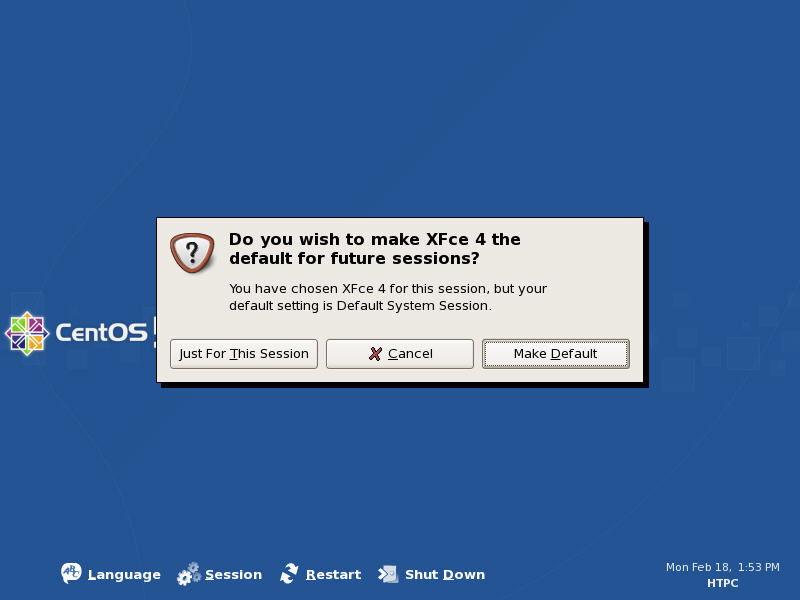
Before logging in, click the "Session" option at the bottom and choose "XFce 4" from the session list. Once "Change Session" is pressed, CentOS will want to know if this session should be made the default. Click "Make Default" to lock in Xfce.
 |
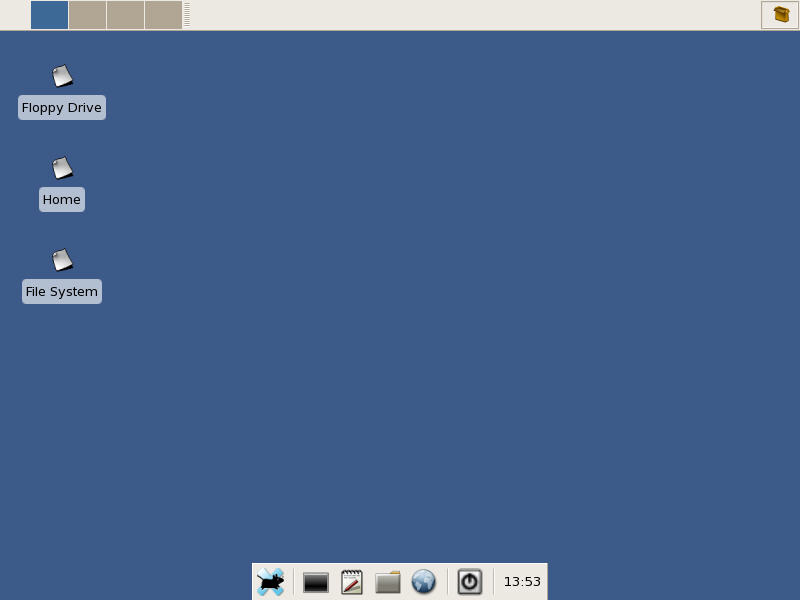 |
| Xfce Startup Splash Screen | Xfce Desktop |
Once the user has logged in using the non-root username and password they created during the initial boot set up, the Xfce splash screen will start and shortly thereafter the Xfce desktop will be displayed.
 |
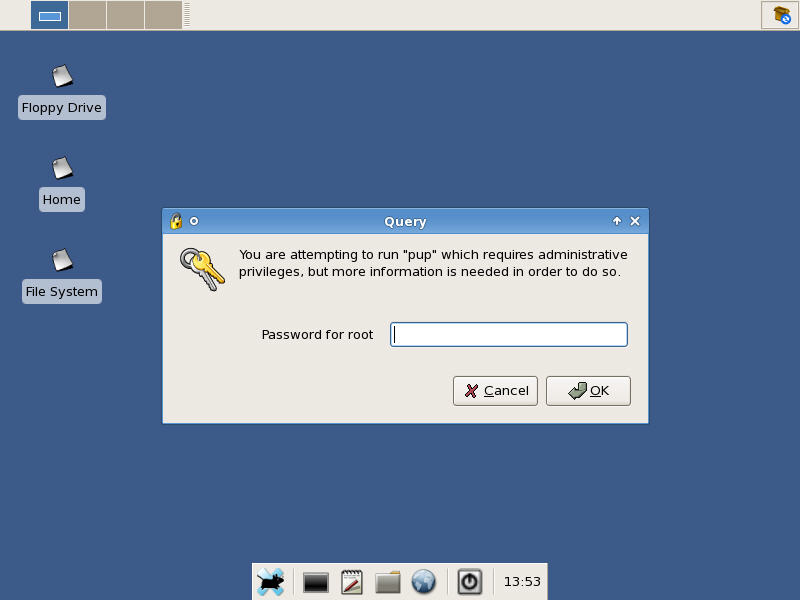 |
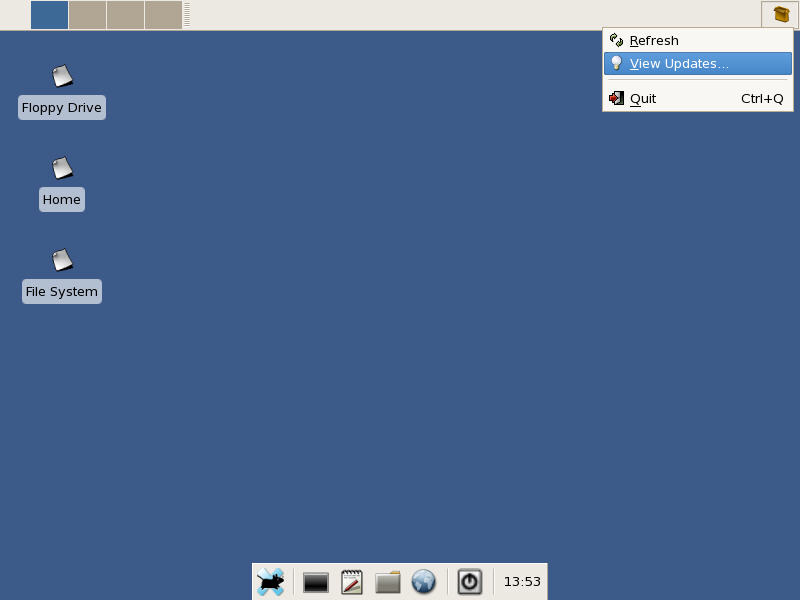
| Package Update Icon | Root Password Prompt |
If an active internet connection is available, the package updater icon will be shown in the system tray in the upper right corner of the screen. Right clicking on this icon and selecting "View Updates…" will prompt the user for the root password. Any time a non-root user tries to run an administrative application, CentOS will prompt for the root password.
 |
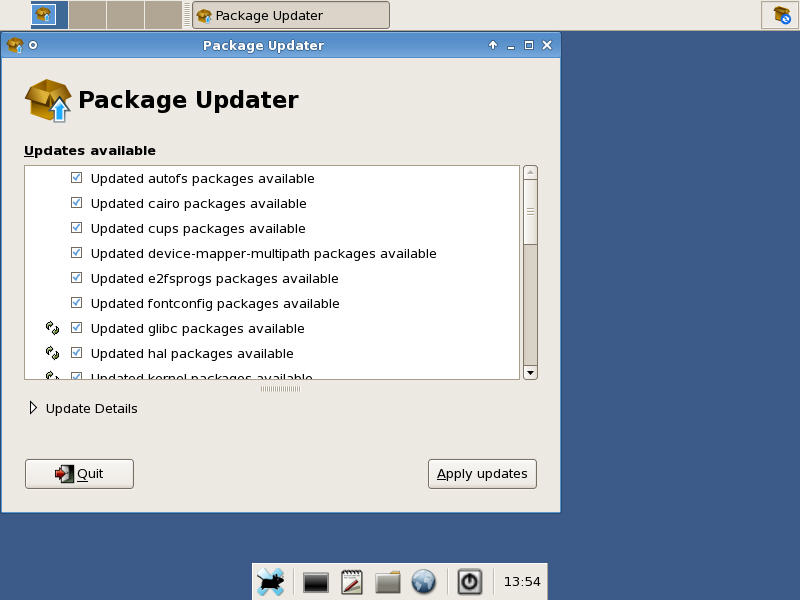 |
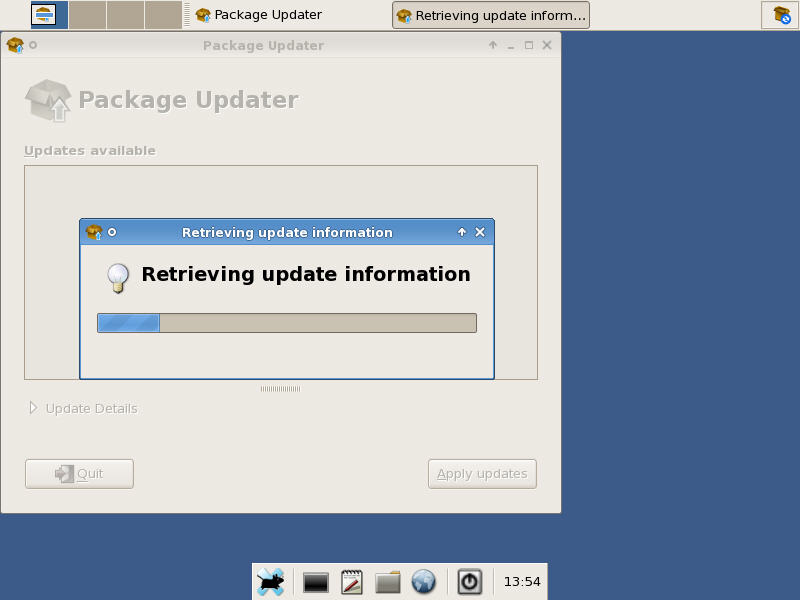
| Retrieving Update Information | Updated Package List |
Once the application is launched, it will search for available update packages. By default, all updates will be selected. Accept this list by clicking "Apply updates".
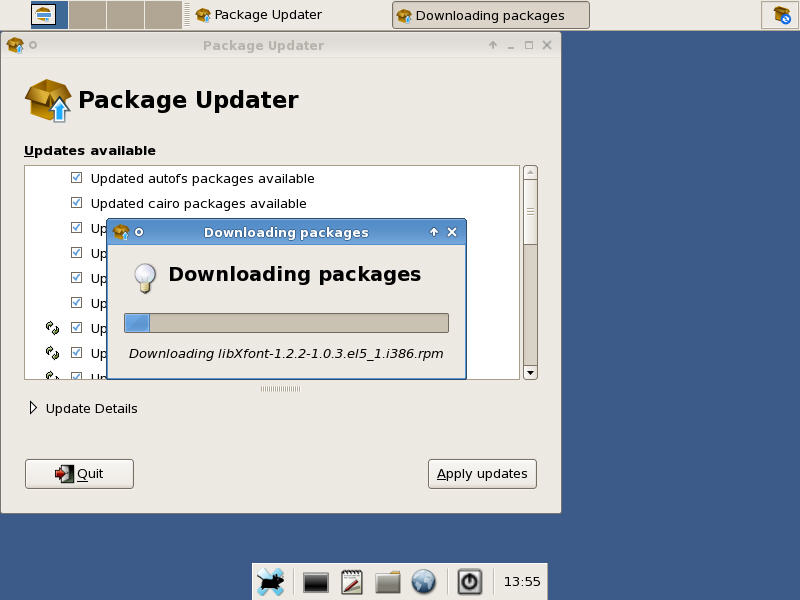 |
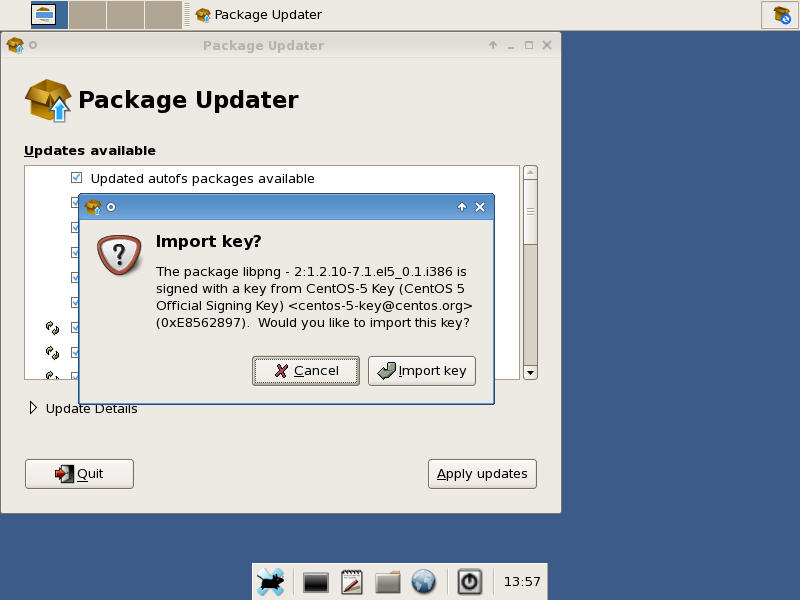 |
| Downloading Packages | CentOS Repository Key |
Now, Package Updater will download the packages. Once that is completed, it will prompt the user to import the requested package key. Package repositories can choose to sign their packages with a special key which authenticates their validity. In this case, the software wants the user to import the key used by CentOS’s repositories. Click "Import key" to continue.
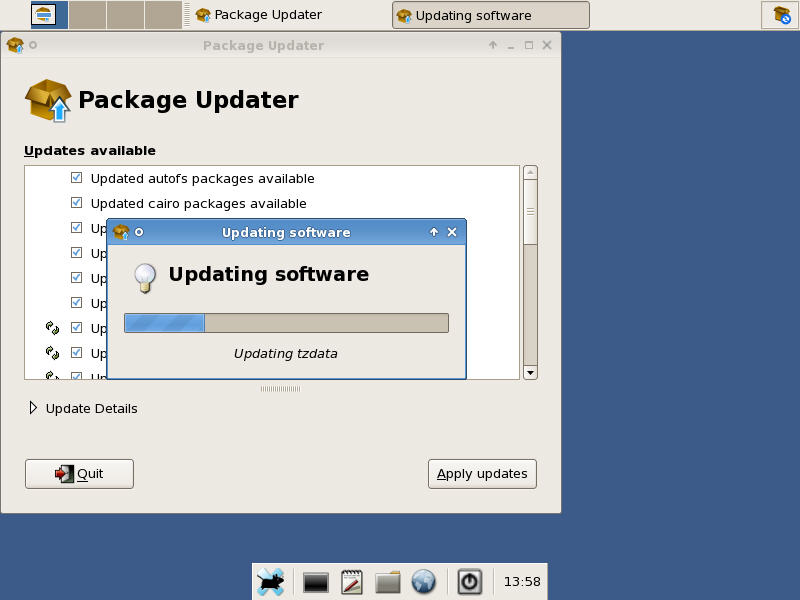 |
 |
| Updating Software | Reboot Request |
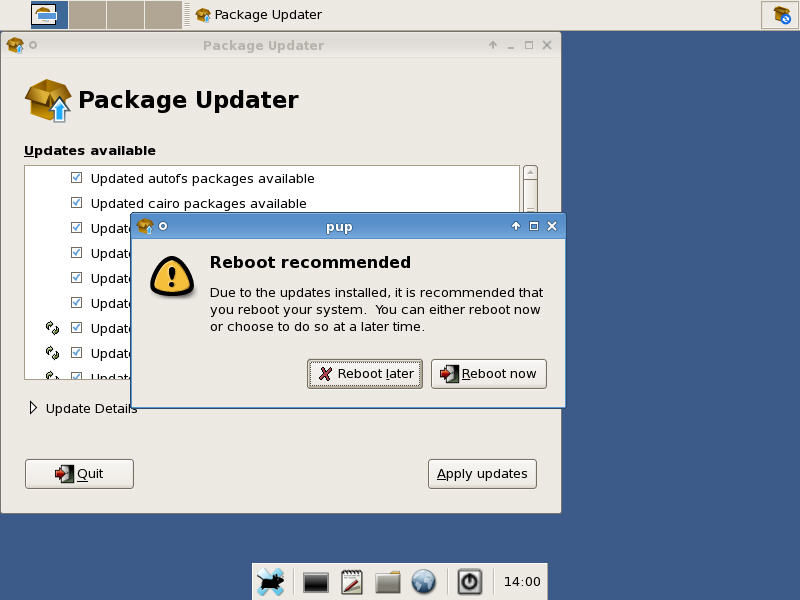
With the key imported, the updated packages can now be installed. Because one of the updated packages was a new kernel, the updater asks if the user would like to reboot now. Choose "Reboot now".
 |
| New Kernel |
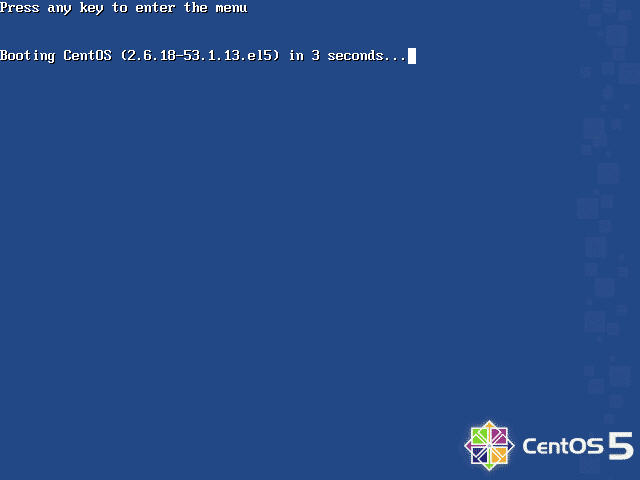
Now that the new kernel is installed, GRUB will report a newer version. Don’t be alarmed if your version is different as new kernels are released regularly.
Conclusion
Conclusion
At this point, the PC has a minimalistic but functional install of CentOS which occupies only 1.3GB on the hard drive. Where things go from here is up to the user. In a following guide, we will further refine and optimize this install. We will also explore some of the methods for its personalization. For now, become familiar with the OS and GUI and how it operates.
If you have any questions or comments regarding your install, post them in our forums by following the "Comments" link below. Also, check out our SSH guide as well as our VNC guide for alternate ways to connect to your CentOS PC. Both provide various ways to expand the Linux experience.
