Tips and Tweaks – Enable Auto Login on the HTPC

It can be a challenge to provide a user friendly “CE” experience on the home theater PC (HTPC) while also requiring users to use a password to authenticate when accessing resources on another PC. So in this edition of the MissingRemote.com tips series we will walkthrough how to setup auto login for your HTPC and disable the other common password prompts so everything is easy to use without compromising security on the rest of the network.
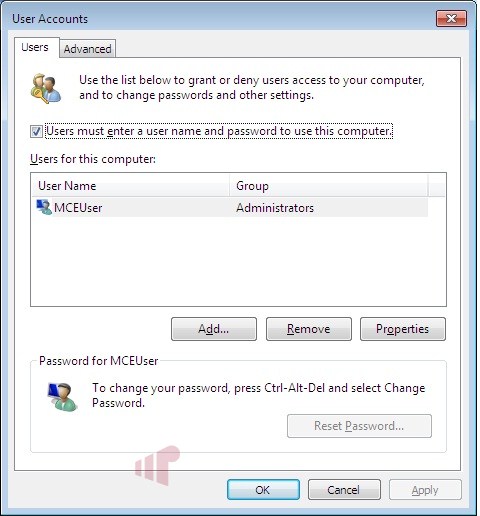
The first step is to run “netplwiz” which will configure the username and password used to automatically log into the PC after a reboot.
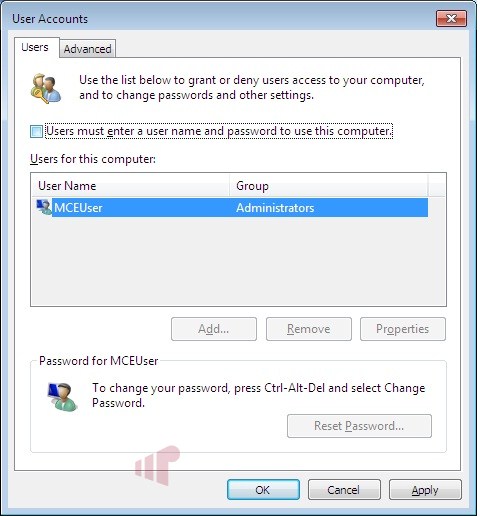
When netplwiz opens you will see a dialog very similar to the one above, which lists the user accounts on the PC. Uncheck “Users must enter a username and password to user this computer”.
Select the user account that should be used from the list and click “OK”.
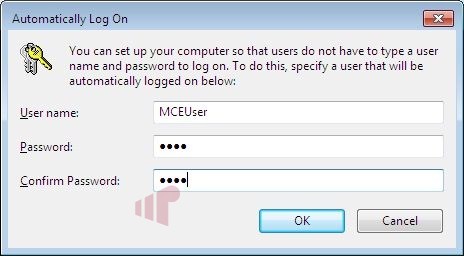
You will then be prompted to provide the user’s password twice. Then click “OK”.
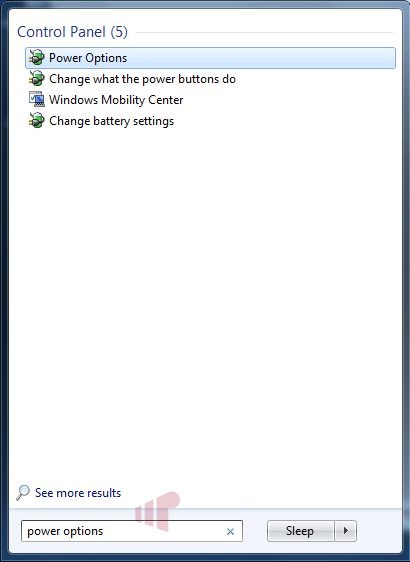
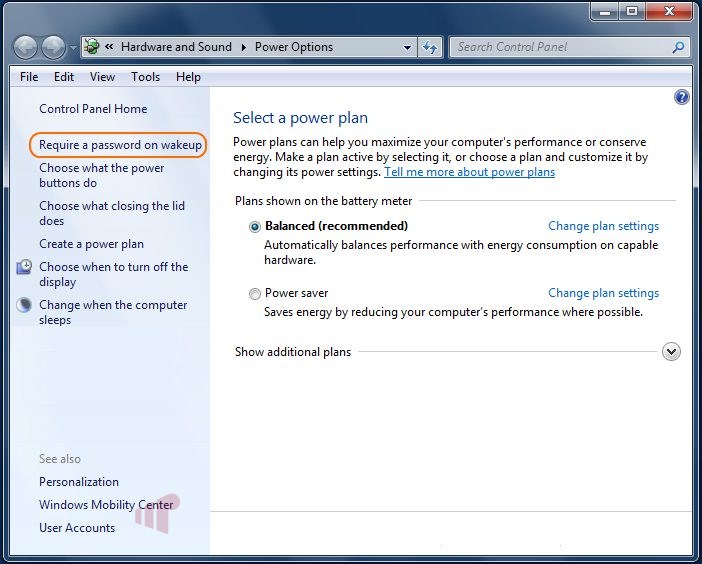
The next step is to make sure that the PC will not ask for a password when it resumes from standby. Open the start menu and type “Power Options”, then select it from the list.
When the dialog opens, select “Require a password on wakeup”.
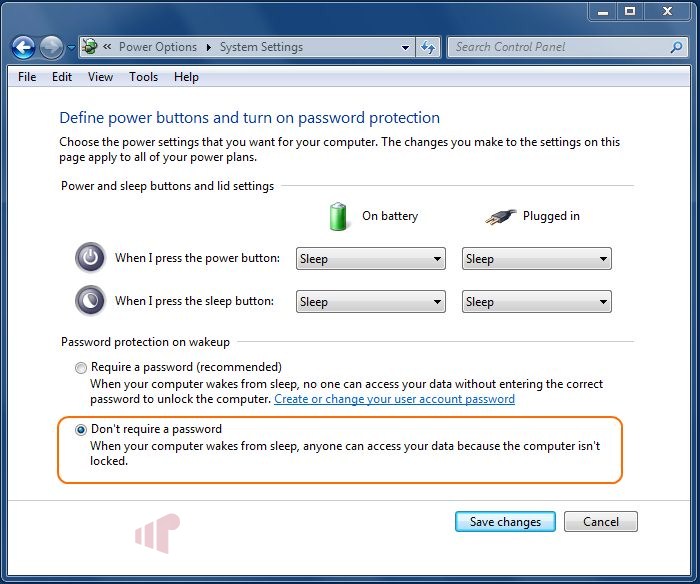
Select “Don’t require a password” and “Save changes”. Note that if UAC is enabled, you will need to click “Change settings that are currently unavailable” to escalate the dialog before the setting can be changed.
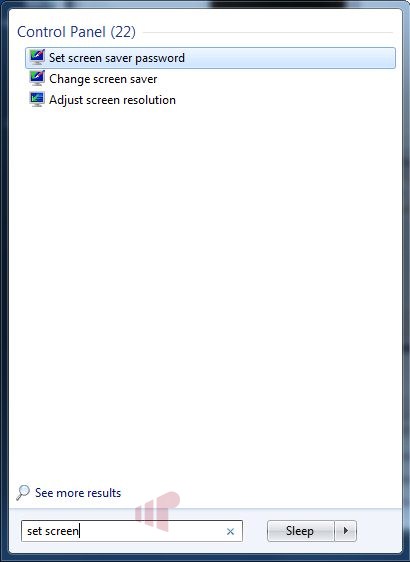
I don’t generally use a screen saver on my HTPC, but if you do, the last step is to make sure it also does not require a password. Open the Start Menu, type in “Set screen[ saver password]” and select the option from the list.
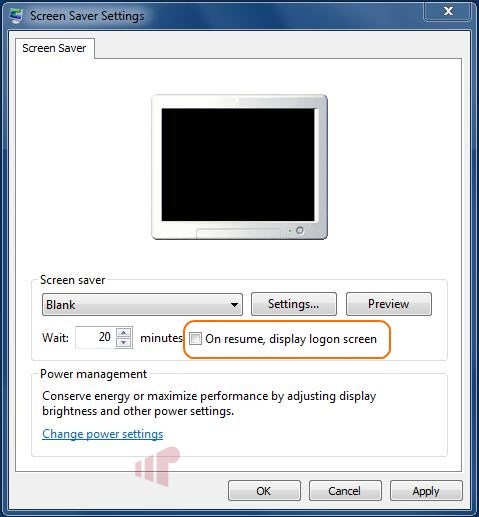
Verify that “On resume, display logon screen” is unchecked and click “OK”.
With those steps complete, your HTPC can provide a better experience, allowing your family to use it without needing to enter (or know) a password for the machine while also allowing access to network resources without requiring password protected credentials.

Great tip Andrew and a
Great tip Andrew and a required task in my household (on most HTPCs I’d guess).
I tend me to make the password numeric as well so it can be easily entered with a remote control if the need arises.
That’s a good point (numeric
That’s a good point (numeric password), I always do that too.
The numeric password is also
The numeric password is also a good tip.
I’ve always done this with my
I’ve always done this with my HTPCs, but I would type “Control Userpasswords2” from a command prompt. It takes you to the second screen capture above.
Every rebuild I have to
Every rebuild I have to search for these instructions. This is definitely one of the best tips.
I’ve performed quite a few
I’ve performed quite a few rebuilds of my HTPC over the past few months and became intimately familiar with the auto-logon process. I also use a simple numeric password for the initial setup and then enable auto-logon as one of the first steps following the initial Win 7 installation. With all of the subsequent reboots that occur following the installation of numerous utilities and drivers, it’s a joy not to have to logon every time.
It is my understanding that
It is my understanding that this only works if you are not in a domain. I had to modify the registry to get the autologon feature to work in Win 7 since all of my computers and useraccounts are members of a domain.
You might want to mention this and include the registry changes that are needed for domain users.
I’d like to second what Paw
I’d like to second what Paw Paw said. This does not work with PC’s in a domain.
I know this is not a “normal” thing as most users out there are not running domains in there homes like I am, but here it is for those who are.
Start->type in regedit in the search box->hit enter
HKLMSoftwareMicrosoftWindows NTCurrentVersionWinLogon
Edit the value of AutoAdminLogon to 1.
Create new string values for DefaultUserName, DefaultPassword, and DefaultDomainName
Enter in the values that apply to you accordingly (you have to specify for all three or it won’t work).
Quit registry editor and continue with the power options changes as above.