SIMEREC Universal IR Remote Control PC Power Switch (PCS-2)

|
SIMEREC Universal IR Remote Control IR Power Switch (PCS-2)
Simerec has created a new product to fill a niche in the HTPC world. |
Introduction
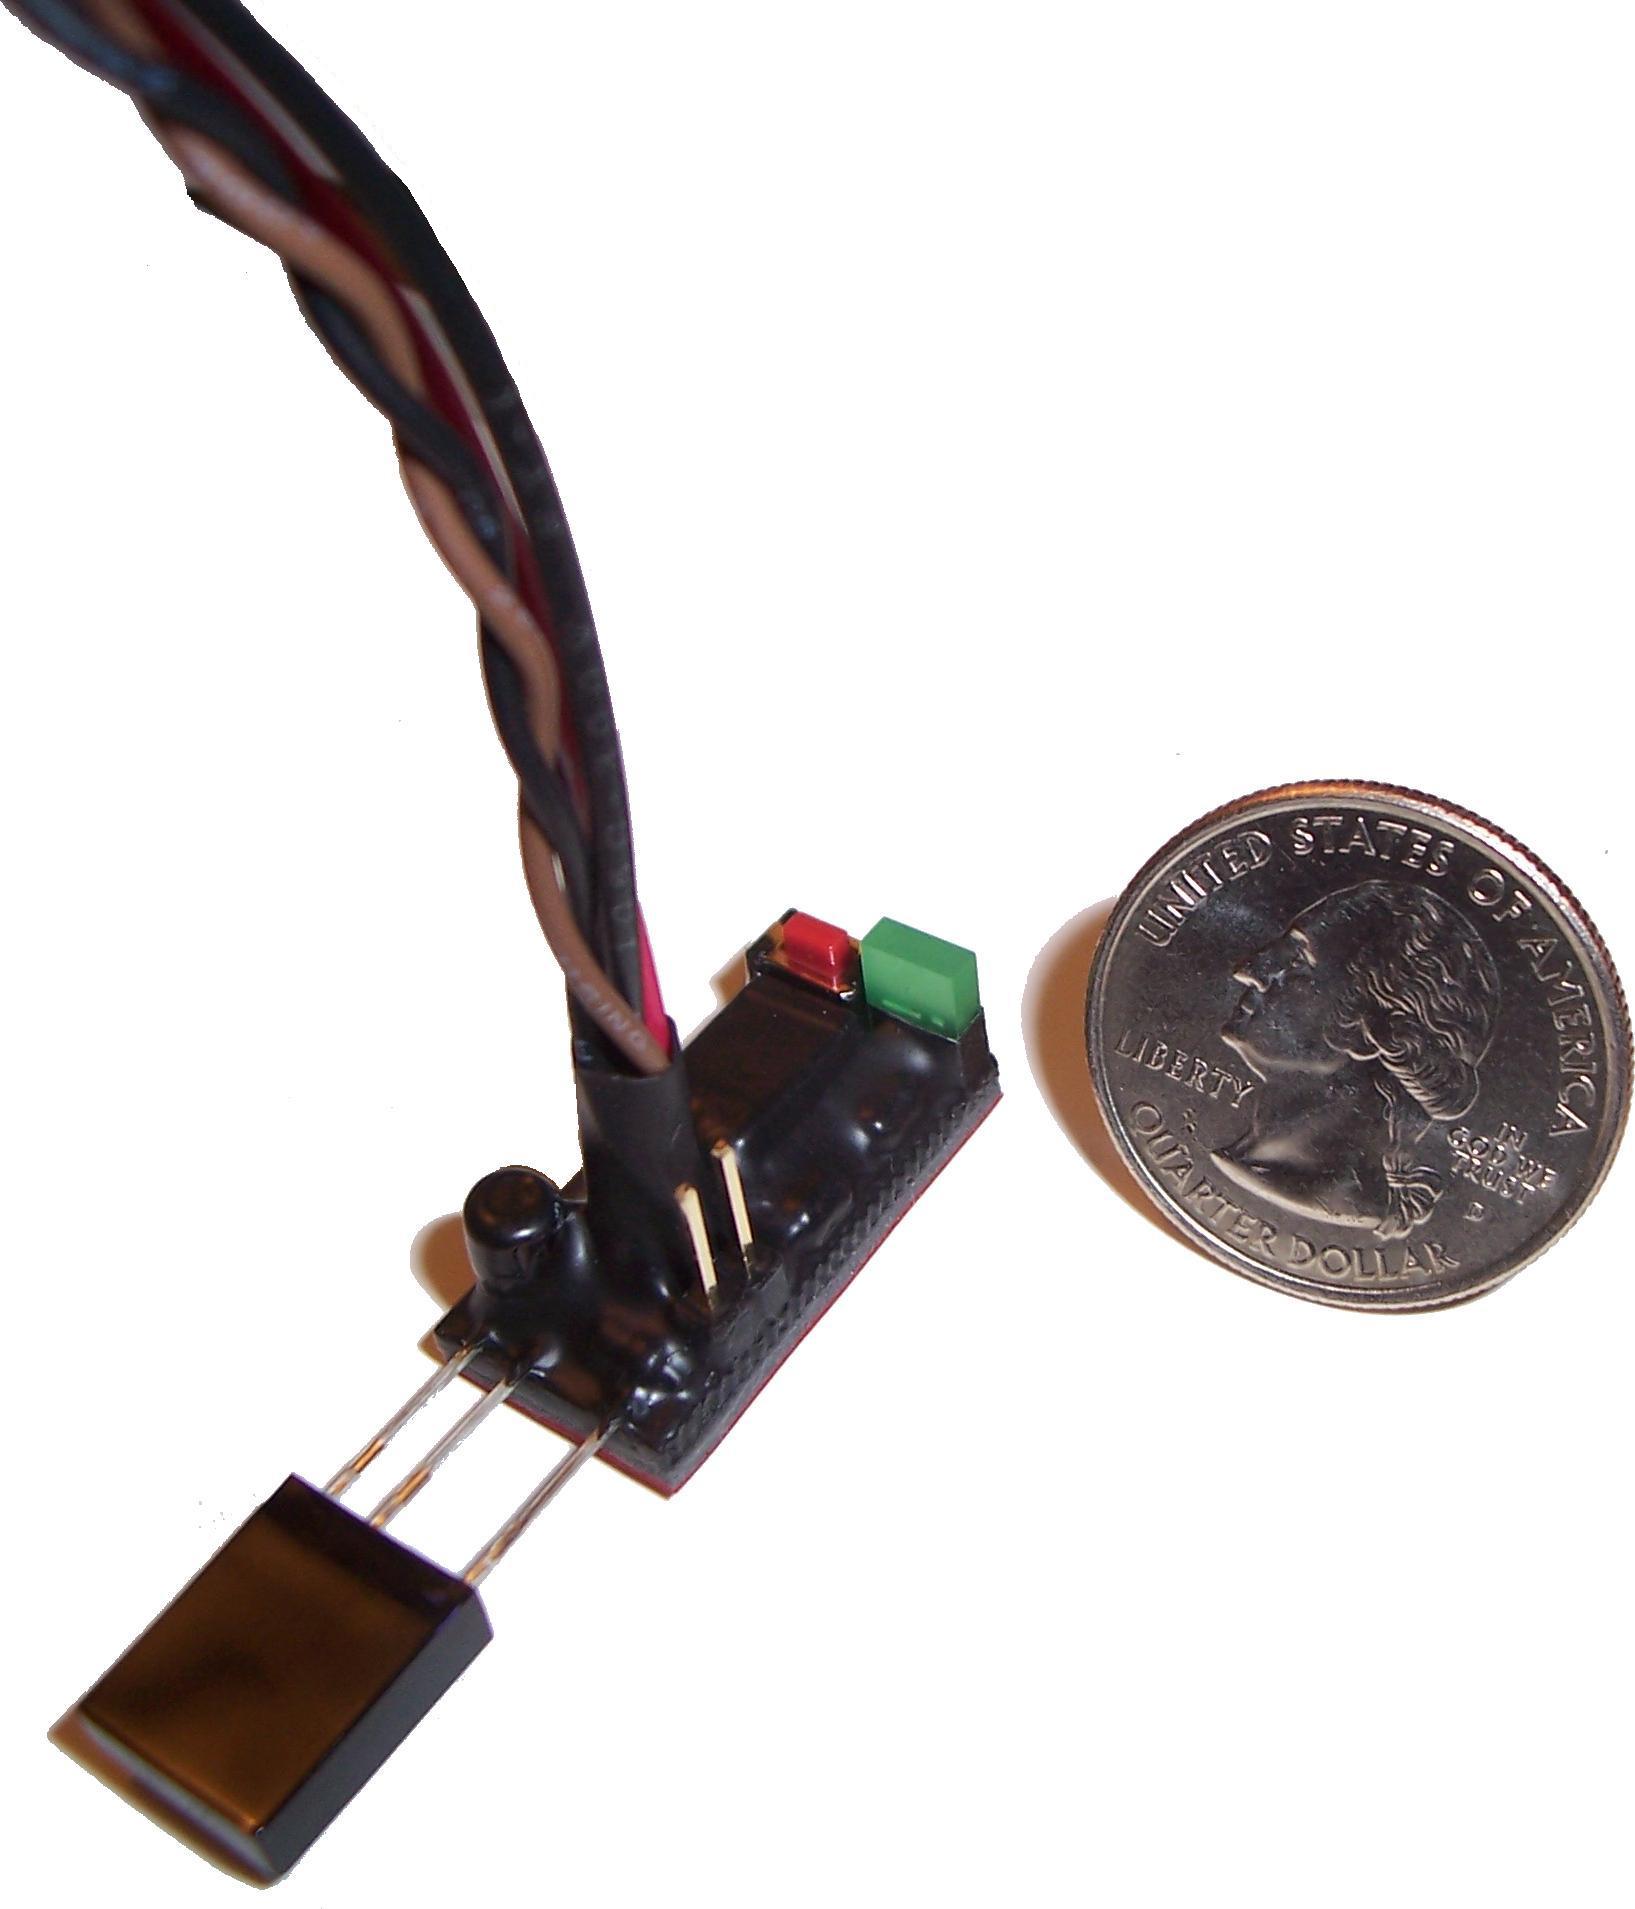
Ever since I have been using my computer to watch TV using BeyondTV 3 back in the early 2000’s I have desired to turn ON my computer. Like many of you I hated having to get up and turn on the computer manually. I have messed around with sleep states and remotes that can wake up the PC (MCE remote) but I have not had 100% reliable response with S3 wake up on all of my HTPC motherboard. A couple of weeks ago I saw a post about an IR reciever that is would fit the bill. I ordered the complete package (you can purchase the parts and build it yourself) and could not wait to try it out.

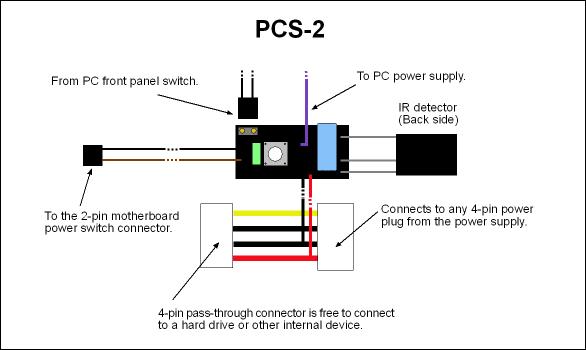
the case ATX power switch and gets stand by power from the purple PSU
wire. It comes completely assembled in an anti-static bag. In the bag
there is 1 button, 1 green led, 1 wire inline connector, and the PCB
board. The whole thing is slightly smaller than a common lighter. The
back of the PCB board has double side 3M foam tape for mounting. The
only unique thing I saw was all of the components and the PCB are
covered with liquid electrical tape, which is a nice touch. There is
absolutely no fear of a short from a wire hitting the PCB.
Installation
The PCS-2 is requires some basic electrial work and for a nice complete install will require case modding for most. The first step in the install process is to find a suitable installation location. My 4U rackmount HTPC case has a lot of openings in the front and did not require cutting the case. If you must cut your case in order to mount the IR reciever in the case I would recommend a dremel rotary tool to cut a 3/8" hole. The PCS-2 installs inline with the ATX power switch. The case switch plugs into the PCS-2 PCB and then the power wire from the PCS-2 connects to the front panel connector on the motherboard. Once installed the case power switch will still function properly. You then need to attach the purple wire to the purple wire on your ATX PSU, this is what allows the switch to operate even when the PC is in an OFF state. The provided inline crimper does an adiquate job and is easy to remove in the future, however it may void the warranty of your PSU so procede with caution.

Once the hardware is connected the only thing left is to program the IR switch to turn off and on with any IR remote. The coolest feature about the switch is that there can be independant ON and OFF IR signals. This will allow my Harmony remote to only use the correct IR signal and not get off cycle and turn the PC on when I want it off, something that drastically lowers the WAF on any HTPC build.
Programming&heading=Programming
Programming
The PCS-2 is relatively easy to program and requires little effort. However is should be noted that there were no directions included in the packaging and I did need to download the PDF version from the website, not a deal breaker but it would have been easy to include and would have made the process much faster.
The basic steps of programming the PCS-2:
- Turn the PC off, with the cord plugged in and ATX rear power switch on the PSU in the on position
- Push the button on the PCS-2, the light will turn on if the purple wire was connected correctly
- Once the light is on you now need to choose which button on the IR remote of your choice you want to turn on the PC. I chose an unused surround button on my digital lifestyles 32" LCD TV, which will be in a different room than the HTPC.
- Place the PCS-2 and the IR remote around 6-8" away from each other and push the remote button. The PCS-2 LED will flash and then come back on. You need to push the "power on button 4 time before it is recognized. After the 4th time the LED light will flicker and come back on.
- Now it is time to choose the Power OFF button. I chose an unused button on the same remote.
- Push the button and the PCS-2 LED will turn off and then on again. Push the button a total of 3 times.
- Upon completion the LED will stay on, you need to then power cycle the PC in order to store the commands into the memory of the PCS-2
- Test the PCS-2 by turning off the PC with the newly learned IR command. My setup work perfectly the first time.
Conclusion
Final Thoughts
The PCS-2 was a simple and quick install on my particular setup and was completely worth the $39.99 that it cost and the time it required. The PCS-2 works great, it is very responsive and allows any IR remote to turn on any PC and also power toggle with separate button. I am using the PCS-2 in combination with a Logitech Harmony 890 and the RF extender. I have programmed the 890 to turn the HTPC on when the activity is selected and turn it off, which I have set to sleep S3, with the all off button.
This is a niche product and definately fits my need and have improved the WAF of my home theater by eliminating the out of sync power toggle with the Harmony 890 remote. Prior to the installation of the PCS-2 when my HTPC would turn on to record a TV show and my wife would hit the "watch TV button" it would put the PC to sleep, completely agrivating my wife and usually leading to a "why can’t we just have a normal TV around here" comment.
Since installing the PCS-2 a week ago I have not had a single power cycle sync issue and I only have to use one of the IR blasters for both the MCE IR reciever and the PCS-2 due to the power of the Harmony RF extenders basters.
The PCS-2 will allow HTPC users more control over their PC’s with out having to move from the couch and might be a fix for that nagging WAF issue you have.
The SIMEREC PCS-2 can be purchased directly from SIMEREC’s website

Hello David
Very nice and
Hello David
Very nice and informative review!
I just purchased and installed one of these on a pc I built.
It is going in the living room so I can use my 58″ Panny Plasma as a monitor.
I have the Harmony One remote and did get the remote programmed to power on/off the pc using the “+” button on bottom left of remote. I noticed you mentioned you were able to get an “activity” set up for your pc. I am having trouble getting that one figured out. Like you, I have the WAF to consider and ONE button would be fantastic! Could you please explain how you set up your Harmony remote?
Thank you very much
Todd Sanders